
Microblading Fading – How to Fade your Brows Quickly
If you are NOT happy with your brows after microblading then you should know that there are several steps you can take to help fade your brows quickly.
Before you decide to fade your brows you need to ask yourself a few questions though, to make sure that it is the right decision.
Are you happy with the shape of your brows?
Is the style or size of the brows fine?
Are you worried your brows are too thick?
Do you think your brows don’t fit your face?
All of these may simply be a NORMAL part of the healing experience and may naturally fade over time.
Learn more about the process below:
Reason to Fade your Microblading
Are you unhappy with your microblading results?
If so you may feel the need to try and get back to your old brows as quickly as possible.
Before you do that wait just a minute!
Are you sure you really want your old brows back?
The reason I ask is because you need to know that there will be some NATURAL fading of your brows over time (usually in as little as a few weeks and before the touchup).
Immediately after you get your brows done is the worst time to assess whether or not you like them.

They often appear “thick” and/or “dark”.
This is usually VERY normal!
Your eyebrows are a critical part of your face so you may just need some time adjusting.
In addition, the thickness and the darkness of the brows will immediately begin to fade, even before your touch up.
But what if you REALLY hate them?
If you are experiencing significant distress regarding the size, shape, thickness or color of your brows then it is possible that your artist simply did not go a great job.
Sometimes the shape of your brow may not compliment your face, or worse they may have made a mistake.
If this happens to you then it may be worth an attempt to fade your brows quickly (to get back to normal).
So how do you go about fading your brows?
The idea behind fading your brows is quite simple.
The process of putting the new brows on your face is a semi-permanent procedure.
By definition this means that it IS reversible.
If you left your brows alone (and didn’t get the touch up) they would naturally fade over the next 6-8 months (or even sooner).
The process of microblading places the pigment in the dermal-epidermal function of the layers of skin.
The epidermal layers of your skin naturally slough off over time and as they slough off they bring with it tiny amounts of pigment.
So we can fade the brows quickly by focusing on therapies that increase the turnover of your skin cells and therapies that help draw pigment out of the skin.
Below I go over 5 different methods and therapies that you can use to help remove microblading from your skin quickly.
5 Ways to Fade your Brows
When following these therapies remember one thing:
Be gentle to your skin!
I would recommend that you avoid invasive procedures such as laser therapy or deep skin peels.
These may work, and they may work quickly, but they also come with the risk of permanent skin damage.
It’s NOT worth this risk because you can fade your brows over the course of a few weeks to months by following these procedures.
And one final thought:
Before you fade your brows please make absolutely sure that you are NOT happy with your brows!
You don’t want to make a snap decision immediately after you get microblading done.
I recommend waiting at least 7 days after the procedure before you make any decisions, because you may end up loving your brows!
If it helps you can also see the entire microblading healing process with pictures to see exactly what other people are going through.
If you are absolutely sure you want to proceed then follow these steps:
#1. Don’t Follow After Care Instructions
The #1 rule for maintaining your microblading results is to follow the aftercare instructions to the “T”.
Which means that if you want to fade your brows you can break all of the after care instructions.
That means go ahead and gently cleanse your brows each morning and night (with a gentle cleanser such as this one), it means that you can exercise and it means that you don’t have to be shy about touching your brows.
Just be sure that you don’t increase your risk of infection by playing with the brows too much.
The microblading procedure does result in some minor (yet reversible) damage to the skin so make sure you respect the healing process still.
#2. Sweat & Exercise
The next step is to make sure that you sweat, sweat, sweat!
Sweating will help liberate pigment from the skin and draw it to the surface.
It will also act as a dissolving agent for the pigment in the skin.
When I am talking about sweating I mean dripping sweat.
This means that you CAN and SHOULD exercise, especially using high intensity work outs.
Work yourself up until you are dripping with sweat (at least 3x per week).
Combine the sweating with the gentle cleansing above both morning and night.
#3. Microdermabrasion & Facials
If you are serious about getting the pigment out then you can also try more advanced exfoliative procedures designed to increase cellular turn over.
Procedures such as microdermabrasian and facials with cleansers can help exfoliate the upper layers of the skin and help the body naturally get rid of the pigment.
You may need several sessions of microdermabrasion but you should notice a definite “lightening” after each and every session.
This should only be necessary for 1-2 months before your brows fade to an amount that is probably not very noticeable (except to you).
#4. Sauna (preferably FAR IR sauna)
Using a sauna is an easy way to work up a sweat (without exercise) and help detox the body.
Using a FAR IR sauna will bring you to a deep sweat within 15-20 minutes and it is very effective at helping heal the body and push out the pigment from microblading.
If you don’t have access to a FAR IR sauna you can also just use a regular hot box at your local gym.
Use a sauna up to 3x per week for at least 20 minutes or until you are dripping with sweat.
#5. Exfoliating Facial Products
Beyond gentle cleansers you can also use certain chemicals to help speed up the cellular turn over of the skin naturally.
Retinol, otherwise known as vitamin A, can dramatically speed up this turnover time.
It normally takes your skin up to 60 days to “slough” off before a new set of skin cells replaces the old cells.
Using retinol can speed up this process and cause your body to slough off old skin every 20-25 days instead of every 55-60 days.
Daily use of retinol also makes the skin “thinner” which is one of the reasons that you should NOT use it prior to getting microblading done.
If your skin is thinner then it’s easier for the pigment to go deeper into the skin.
I recommend using a retinol product such as this.
#6. Don’t get Your Touch up
This is a tricky one.
In general if you want to fade your brows you don’t want to get the touch up.
On the other hand, your artist might be able to fix your brows at the touch up or fix the issues that you are unhappy with.
Before you skip the touch up it’s best if you touch base with your artist and ask if they can alter or fix the issues that you are dealing with.
If they don’t think anything is wrong then it may be a good idea to skip the touch up.
Remember:
The touch up is designed to increase the longevity of your brows, so you don’t want to undergo the procedure if you want your brows to fade quickly.
Wrapping it up
Want to fade your brows quickly? Here is what you need to do:
- Exercise 3x per week until you are dripping with sweat
- Use a sauna if you don’t want to exercise that intently (at least 3x per week)
- Cleanse your skin morning and night with a gentle cleanser
- Apply retinol serum in the evening to increase cellular turnover
- Get microdermabrasion or facials if you prefer
- DON’T follow the aftercare instructions
- DON’T get the touch up!
Now I want to hear from you:
Are you happy with your brows?
Do you want to fade them quickly?
Why or why not?
Leave your comments below!


How Much do Microbladers Make? A Comprehensive Look
You might be surprised at how much microbladers can make, especially if they do it right working from home.
Microblading is perfect for women who want to add extra income to their already existing business, or simply add some extra money each month for a few hours of work each week.
Maybe you’re just curious and want to start your own business, either way this is the post for you.
More…
Microbladers Make How Much?
Microbladers right now make around $50 to $150 per hour.
Generally the cost of microblading for clients ranges from $250 to $600 (with an average around $350 or so).
When you consider that the microblading process takes about 4 hours start to finish you can divide up that cost minus an hard costs to get your hourly rate.
The more experienced you are, the more techniques you know (shading, soft tap, ombre, etc.) the more you can charge and the higher your hourly rate.
One of the best parts about microblading is changing women’s lives (this is the part I love the most).
 <img class=”tve_image” alt=”Microblading after 8 months without touch up” style=”width: 600px” src=”//browsandbody.com/wp-content/uploads/2017/04/Microblading-after-8-months-without-touch-up-e1492279861701.jpg” width=”600″ height=”600″ data-attachment-id=”1169″>
Women will walk into your office self conscious about their brows and will be transformed within a matter of hours.
It’s not uncommon for my sweet clients to be so happy they cry when they see the finished result!
Nothing is better.
Microblading will bring in on average an extra $2,000 to $4,000 per month depending on how much you work.
If you charge the average price of $350 per client, then you only need 10 clients each month to bring in $3,500 every month.
That’s really good considering each client will take around 4 hours or so.
This is the perfect job for someone who wants to bring in extra spending money.
If you want, you can always do more clients as well to make this a full time job.
One of the best parts about microblading is that YOU determine how much you want to work and how much you will make.
Microblading is taking off right now, so if you are thinking about it DON’T wait.
The longer you wait the more saturated the market will be and right now is the PERFECT time to get started.
 <img class=”tve_image” alt=”Microbladers make how much” style=”width: 405px” src=”//browsandbody.com/wp-content/uploads/2017/05/Microbladers-make-how-much.png” width=”405″ height=”816″ data-attachment-id=”1958″>
Do I need a license to Microblade?
To get started with microblading you do NOT need a license.
Most microbladers are either cosmetologists or aesthetiticians.
But I’ve trained other women who don’t have any background in the cosmetic industry and they’ve done very well.
Microblading is an art form and so most women who have an artistic eye for style will do very well in the field.
The only thing you need to make sure you are comfortable with is cutting into people’s skin.
For some women this can be a big turn off, but for others it’s not a problem.
It’s also worth pointing out that you will get used to this over time.
Microblading at home vs in a Salon
Another amazing benefit of microblading is that you can do it from your home!
This means that you can add an extra income each month without taking a huge risk of renting out office space or signing a lease.
Currently the majority of microbladers out there are practicing from their own homes.
There are several salons that exist as well if you are more comfortable in that setting.
Just realize that if you rent out an office space that will reduce your hourly rate.
How do I get training for Microblading?
One of the main benefits of microblading (at least for now) is that it does NOT require a license to get started.
Most microbladers are/where existing cosmetologists or aesthiticians before they started microblading, but many women simply pick up the skill through practice and a comprehensive training program.
Currently state laws do not regulate the use of Microblading, which means that you can start right away.
But this also means that you NEED to get into a good microblading training course.
You will want to find a comprehensive, hands on training program that will teach you how to be a proficient microblader by the time you have completed the program.
If you live in Arizona you can find out more information about my microblading training program by clicking here.
This 2 day hands on course is designed to take you from beginner to a practiting microblader in as little time as possible, and we are proud to say that our microbladers feel READY after training to start on their own.
This is a big deal, because if you don’t get the proper training you will end up having to spend more money doing extra training before you feel comfortable.
If you have any questions about microblading or training please leave your comments below and I will get back to you as soon as possible.
Marketing your Microblading Practice
Once you decide to pursue your microblading career you will need to market your practice to get some clients!
One of the best ways to get clients is through social medica, specifically instagram.
Instagram is a visually oriented social media platform which works beautifully with microblading!
It allows you to showcase your work and can really turn prospective clients into warm leads who want your work.
In my training program I walk you through microblading marketing basics including how to set up your instagram and other platforms for success.
Back to you
Microblading is an amazing career.
You seriously get to transform people’s brows right in front of them and they will love you for it.
Now it’s your turn:
Are you interested in microblading?
What’s holding you back?
Leave your comments below!

Microblading Training In Arizona: 2-Day Hands-on Microblading Course
(We have now trained over 70 microbladers! We are filling for our next class. You can reserve your seat in the next program by texting or calling Mel at 480-298-7344 or you can email here: browsandbodyaz@gmail.com)
Microblading is exploding and we want to help you get ahead of the curve!
Microblading, as an artist is a rewarding career that can help you make your clients look and feel beautiful while providing a great income for yourself!
But how can you get started? Where do you need to go to get training? What type of training do you need?
All of these questions and more will be answered here and you will be able to learn about our comprehensive 2-day microblading training course.
We’ve trained over 60 microbladers to date who have all gone on to add microblading to their toolkit!
We want the same thing for you.
Our course is designed to provide you with everything you need to know in a comfortable setting. We have cut down on all extra costs related to training and have passed down those savings onto you.
The result?
A succinct and comprehensive course designed to get you up and ready to microblade over a 2-day period.
Not only will we teach you the technical aspects of microblading but we will also teach you how to market and build your microblading clientele!
A huge part of getting that clientele means that you have to put yourself ahead of the curve with advanced knowledge and technique like shading, color theory, and softap.
Microblading education is not standardized which means that some programs contain bits and pieces of information but very few have put it all together.
That means you are left to take multiple courses or figure it out on your own through trial and error.
But what if you don’t have the time (or knowledge) to do that?

Learn Microblading in this Hands-on Beginner Course
The solution? A hands-on and comprehensive microblading training course.
And that’s exactly what this course is:
Hands-on, which means you need to get ready to practice, practice, practice.
This microblading training course is for beginners. Designed to take you from someone who has only heard about microblading to someone who is confident taking their very first client.
From start to finish we will teach you everything you need to know, ranging from microblading techniques to how to set up your microblading practice.
You do NOT need any experience or licensure to sign up and start doing microblading (but note this might change in the future so getting in early will allow you to be grandfathered in).
This makes microblading perfect as an extra source of income for stay-at-home moms, or for women who want to break out of their current job and start their own businesses.
Either way, you can get started and make an extra $1,000 to $5,000 per month and up to $150 per hour.
One of the main benefits of this course is that we walk you through the entire process leaving no stone unturned.
Many people go through expensive programs and yet come out feeling like they aren’t ready to actually practice on real clients.
Don’t let this happen to you!
This course is designed for you if you want to take your microblading skills up to the next level.
Some microblading courses include only basic techniques but don’t necessarily prepare you for the real world.
More advanced techniques like learning color theory, how to market your services, how to price your services, and how to build a clientele are often left out.
I have taken thousands of dollars worth of courses and have boiled this program down to the most essential components.
You can see examples of my work including before and after pictures here.
Microblading Testimonials From Our Students
Don’t take our word for it!
If you are interested in our approach to microblading training please watch these testimonials from people who have taken our course:
How Much Can You Make with Microblading?
As a microblader, you can eventually expect to charge on average around $350 per client in the Phoenix metro area.
We’ve trained many people from out of state as well and the prices vary based on your city and location.
At 10 clients per month that is roughly $3,500 per month.
Getting 10 clients per month as a new microblader is not difficult so you can expect to pay off your training program within the first 1-2 months of practicing!
You can do as many or as few clients each week/month as you desire and base your income off of that.
As an example, as little as 20 clients per month can bring in $7,000 of extra income.
As a microblader, you can expect to make around $75 to $150 per hour.
In our course, we teach you how to get your microblading practice up and going, including how to start your practice out of your home if you’d like and how to do marketing to get your first clients.
Benefits of taking this Microblading Master Class:
- 2-Day of hands-on training so you feel comfortable seeing your first client after the training course
- Practice on both artificial skin and real clients
- Opportunity to increase your earnings and charge the right price
- In-depth coverage of basic techniques
- In-depth overview of color theory so you are comfortable when choosing your pigment on each client
- Practice materials to hone your skills
- Microblading Manual for you to take home
- Advanced marketing course so you learn how to show off your skills and get new clients

What you will learn:
- Microblading theory
- Microblading technique
- Safety and sterilization best practices
- Advanced marketing techniques
- How to build your Instagram account
- How to use giveaways and other tactics to build your audience
- How to properly match pigment choice to clients hair/skin texture and tone
- How to pick your price and increase your price as your skill increases
- How to customize strokes, pigments, and design for individual clients (including tough cases)
- Color Theory
- How to get new clients
- Aftercare instructions
- The best products, blades, tools, and pigments
- How to design brows from scratch without using stencils
- Proper microblading technique including the order in which to fill in your brows
Included in the course:
- Study guides & Practice worksheets
- Certificate of completion
- Marketing information
- Note: A complete microblading kit is available for purchase
Meet your Instructor:

Message from Mel:
I’ve been doing brows for over 11 years and microblading for almost 2 years.
I know what new microbladers go through after their training course (and the problems for microbladers looking for training) which is why I wanted to make this program.
I spent thousands of dollars on programs to learn more about color theory, shading, advanced techniques and I have taken the best of each one and have applied them to my current style.
I’ve seen other microbladers come and go because they don’t have the confidence to continue after training.
The truth is that microblading can be difficult and unless you have the right tools and knowledge it may be difficult to get started and build your business.
If you have any questions please don’t hesitate to ask, I really just want you to be successful and LOVE what you do.
Curriculum Sneak Peak & What you will Learn:
We have put together the most comprehensive microblading course out there. Designed take you from no experience to someone who is capable of doing a client ALL on your own immediately after the training.
Some programs teach you the basics but leave you feeling not ready to take on clients in the real world.
Day 0
- Training starts with taking a Blood Borne Pathogen class. This is both for your safety and your clients.
Day 1
- Day one is focused on microblading theory and basic aspects of microblading that you need to know including color theory, safety issues, microblade handling, patient communication, etc.
Day 2
- Hands-on microblading training with a model. We also go over the basics of setting up your microblading business, how to market and how to be successful upon completion.
Post Training Shadowing & Practice:
- After training, you can shadow one of your instructors. This will give you an idea of what a complete client looks like start to finish. You will also be given practice sheets so that you can continue to practice and hone your skills over time.
What’s inside your Microblading Starter Kit:
- 5 Li Pigments
- Microbrushes
- Zensa Numbing Cream
- Microblading pen
- Mascara Wands
- Brow scissors
- Tinkle Razors
- Variety of microblading blades & sizes
- 2 Types of measuring calipers
- Shaping pencil
- 3M foam tape
- Mannequin head
- 70+ microblading training manual (with microblading theory, practice pages, consent forms, and client walkthrough)
- Exacto blade
- Pigment rings
- Alcohol pads
- Face masks
- Sharps container
- Box gloves
- Wipes
- Chucks
- Tattoo practice pads
- Biohazard bags
Our microblading kit is valued at over $500 and includes EVERYTHING you need to get started.
*Note: Your kit contains enough pigment/blades for 15+ microblading clients (with over 30 blades for both practice and clients).


How it Works:
We hold our training program every month.
We keep these training groups small and intimate with a maximum of 4 students per class.
This allows us to pay more attention to each person and allows a higher quality of teaching.
Our focus is making sure that YOU feel comfortable and capable when you walk out of our 2-day program.
In order to reserve your spot for a specific date, you must put down a deposit for that date.
Once you have reserved your seat you will be sent pre-course instructions.
The actual 2-day hands-on training is located in Chandler, Arizona we will meet on two consecutive days.
Day 1 we go over basic information which is necessary to build your foundational knowledge of microblading and aesthetics in general (it helps if you have an aesthetic background for this portion).
Day 2 we focus on models and hands-on training to ensure that you feel comfortable at the conclusion of the training.
Day 2 we also focus on practice building, marketing and how to jump-start your business to help you succeed!

Microblading Training FAQ
How Much does your Training Cost?
Please reach out to us via email or text us and we can give you information about the cost of this program!
We have done our best to make our training program highly affordable by cutting out extra costs and passing the savings on to you.
What is microblading?
Microblading is the process of using a “microblade” (which is really just a series of tiny little needs) to place pigment in the dermal-epidermal junction.
This process results in crisp “drawn-on” lines that look exactly like a normal brow.
The beauty is that this process (if done correctly) results in beautiful brows that look amazingly natural and last for as long as 15 months.
Microbladed brows look better than permanent eyebrow tattoos and can be done in around 3-4 hours (including the initial visit and touch-up).
Do I need to be a licensed aesthetician or cosmetologist?
Currently, Arizona law does not require you to be licensed to do microblading (this may change in the future), but we do recommend that you have some sort of beauty background.
Microblading is more of an art than a science (we will teach you all of the techniques that you need to know, but we can’t turn you into an artist in 2 days!).
For a 2-day course, we recommend that you have a “beauty” background of some sort (cosmetologist, aesthetician, tattoo artist, registered nurse, etc.).
This is for YOUR benefit.
If you don’t have any beauty background and you want to do microblading then we would recommend that you participate in a longer training program (5-day course). We do not offer a 5-day course (only a 2-day course) at this time.
We have found that a 2-day course is just the right amount of time for those with at least some background in the beauty industry.
Most people know if they have this type of background! If you’ve done lashes, facials, brows, injections, tattoos, etc. then you most likely won’t have any problems.
Is This a Good Time to Start Microblading?
Yes!
Now is the perfect time to start microblading. Currently, we are experiencing HUGE growth in the field and the people that come out on top with the right knowledge and technique will be able to build a perfect clientele that will last for years.
If you are on the fence about adding microblading to your current skill set then let me tell you not to wait any longer.
As you wait other people will come out well trained and simply be ahead of the curve, that is why it’s best for you to get your training under your belt so you can be 5 steps ahead.
Do You Offer Financing?
Yes, we have partnered with PayPal to offer financing.
With this opportunity, you can choose to make monthly payments or pay off the entire purchase over 6 months without paying interest.
If you choose to go this route then we will need to send you an invoice first so that you can start the process to see if you are approved. Please text/email me if you want to go this route (phone #: 480-298-7344 or email: browsandbodyaz@gmail.com)
You can learn more here:

What’s the Difference Between a 2-day Course and Longer Training Courses?
The difference is all in you!
We have found that a 2-day course is the perfect amount of time as long as you have some background in the beauty industry.
If you are a hard worker and have some experience under your belt then you will have no problem with a 2-day course.
If you have zero experience in the beauty industry or don’t feel that you have natural artistic talent then we recommend that you consider a longer training course.
We just want you to succeed! Whether that is with our course or another.
If you have any questions about if this is right for you feel free to reach out to us directly via text or email (phone #
Can This be Done Out of my Home or Part-time?
Yes to both!
As long as you have a dedicated room and some basic equipment (I will share with you what you REALLY need and what is the best quality) you can do this out of your home.
You can also do microblading part-time (as little as 5 hours per week) depending on how busy you want to be and how quickly you want to build your clientele.

How much does microblading cost for the client?
Microblading prices vary based on the skill of the artist.
Prices range from $350 to $800 for the entire process (2 visits which include the initial and follow-up appointment).
The initial appointment is about 3 hours and the follow-up appointment is about 60-90 minutes.
The more skilled that you are, and the more clients you have completed the higher your price.
To charge higher prices you must be highly skilled and proficient in techniques such as shading and softap technique.
Can I do training online?
I wouldn’t recommend online training only.
There is no substitute for hands-on training which includes you going through the entire process step-by-step with a model.
The model allows you to gain confidence and sets the stage for what you should expect
It’s also very helpful to have someone holding your hand through the process so that you KNOW you are doing everything correctly.
Do I Need to be Certified to do Microblading?
Right now in Arizona, you do not need to have any certifications to start microblading.
I believe this will change in the near future, but likely people who are already trained will be grandfathered into the new rules.
Another reason to get your training done early!
How Long Does Each Client Take From Start to Finish?
Each client requires two visits:
The initial visit which is around 3 hours and the follow-up visit with is around 60 to 90 minutes.
So around 4 to 4.5 hours total per client.

Will I be ready after the training program to start microblading?
Yes.
Part of the program includes practice sheets and study guides which are designed to get you practicing, practicing and practicing.
Practicing will help embed your microblading strokes into your head so that it becomes second nature when you start using them on clients.
The important part here is understanding HOW to do it correctly!
It’s not helpful if your strokes are not done correctly, then you are simply practicing the wrong technique over and over.
How soon can you get me in for the beginner course?
Generally within 1 month (depending on availability), but our classes fill up very quickly.
If you are serious about getting started text, call, or email me and we can reserve your payment and your seat in our next class.
How much does this training cost?
The total cost for this 2 day training is $997.00.
If you have any questions about payments, pricing, or anything else please reach out and we can help answer them!

What to do if your Microblading Didn’t Take
Did you just get microblading done to your brows?
Are you worried that your pigment might be coming out, or that your brows don’t look like they did right after you had the procedure?
This post will go over the main reasons why microblading might not take and the entire healing process!
So you know what’s normal and what isn’t:
Reasons Why Microblading Doesn’t “Take”
There are many reasons why the skin may not accept the pigment or dye after your microblading procedure.
Recall that the microblading procedure is done by making small cuts into the dermal epidermal junction in the skin and placing pigment into the “well” that is created from these cuts.
The body then heals up over the pigment and the pigment remains in the dermal epidermal junction for up to 15 months.
This is what is supposed to happen in a PERFECT world and assuming everything goes the right way.
But what happens if your pigment is coming out during this healing process, what then?
Let’s go over all of the potential reasons this may be happening…
#1. What your experiencing is a normal part of the healing process
Remember that some loss of pigment is a normal part of the healing process!
The best case scenario you can hope for is about 85% pigment retention before your touch up (about 6 weeks after the initial procedure).
That means you might be freaking out from the normal healing process.
Let me give you an example.
You can see an example and picture from the healing process on day 7 vs day 12 below:


On day 7 you might be freaking out thinking that all of the pigment is coming out, when in reality this is completely normal.
Initially your brows are very dark, then they become patchy, then they lighten up.
This cycle can cause an emotional roller coaster – but remember, you have to trust the process!
By day 12 you can see that the majority of the pigment was retained in this client despite what it looked like on day 7.
You can see the entire process in pictures below as well.
#2. Your artist didn’t go deep enough
If it’s been more than 2 weeks and your pigment is gone, then it is most likely NOT normal and related to some other cause.
In this case it may be that your artist did not go deep enough.
In order to get lasting results your artist must go into the dermal epidermal junction.
If the cuts only go into the superficial epidermal layer then your body will basically push out the pigment or dye and it will NOT take.
You know if your artist went the right depth because you will hear a characteristic “tearing” sound in the skin.
There will also be SOME pain (but not a lot).
If this happens to you, you will know it because the pigment will come out as your scabs start to come off and all of the pigment will be gone within 2 weeks.
If this happens to you unfortunately you will need to get the entire procedure done again.
#3. You might have had an infection
Other factors can interfere with the normal healing process and one of those things is an infection.
An infection of the skin will push out the pigment and may result in scarring or other problems.
If you suspect that you have an infection please talk to your artist ASAP!
Most of the time you can prevent small infections from becoming big infections and interfering with the healing process.
Another potential issue which is separate from an infection is a sensitivity to the dye or pigment.
Sensitivities or allergies can act the same way as an infection where your body may reject the pigment and push it out.
Make sure your artist is using a high quality pigment and discusses any allergies you may have BEFORE the procedure! Especially allergies to nickel.
#4. Your artist used the wrong color of dye for your skin tone
It may also be possible that your artist didn’t use the right pigment color for your skin tone.
Using the wrong color can change what the final product looks like and may turn some colors gray.
If this happens the pigment may have taken, but it may look lighter than normal and you may feel like it didn’t “take”.
This ultimately comes down to picking the right artist for you and having a thoughtful discussion with your artist about colors, pigments and dyes prior to the procedure.
#5. You didn’t follow the aftercare instructions!
This is probably the single most important thing on this post!
You HAVE to follow the microblading aftercare instructions EXACTLY.
Talk to your artist about dry healing vs wet healing to determine which will be best for your skin type and make sure you follow their instructions!
Even something as simple as getting wet, putting on the wrong ointment, using a bleaching substance or going out into the sun can seriously impact your results.
I personally use the dry healing process because I think the results are more crisp than other healing types.
But this means that my clients can’t get their brows wet for at least 2 weeks.
That means no swimming or exercising!
Make sure to avoid facial creams and other products like the plague while you are healing.
You can also learn more about proper aftercare instructions in this post.
#6. You were picking your scabs or interfering with the healing process
If you have a tendency to pick at your skin then this one is extremely important.
If you are using the dry healing process then it’s absolutely critical that you do NOT pick your scabs.
Picking off your scabs will prematurely pull the pigment out of the well that we created and will make it look like the procedure didn’t take.
If you have a tendency to pick at your scabs or at your skin then please let your artist know.
It’s also a good idea to use the wet healing process if you fall into this category because scabbing is minimal.
#7. You have oily skin
The final reason your microblading may not take as to do with the amount of oil production in your skin.
Some people naturally produce more oils than others, but what’s important here is that the oil may push out your pigment making your retention less than desirable.
If you have really oily skin make sure to discuss that with your artist so you can determine if it’s worth undergoing the procedure.
In most cases you can deal with the excess oil production and it won’t interfere with your results.
Back to you!
I hope you found this guide helpful!
Remember that some degree of pigment loss is normal (but it should not exceed 30%).
Just make sure to follow the aftercare instructions exactly and keep in contact with your artist if you think something is wrong.
It’s not worth it to sit around waiting when something can be done!
Leave any questions or comments about the healing process below.

Microblading Cost & Price Range: Is it Worth it?
Full disclosure:
I’m obsessed with microblading and anything related to eyebrows.
So obviously I think that microblading is definitely worth it, but I want to give you an honest opinion and give you some ideas as to who I think should get microblading done, if it’s worth it and how much it costs:
More…
How much does Microblading Cost?
Microblading ranges in cost from around $350 dollars to as high as $800 dollars.
The average microblading cost is around $400.
If you don’t know what microblading is, it’s the practice of placing pigment with tiny strokes of a “microblade” in a semi permanent fashion over your existing eyebrows.
The procedure results in beautiful and very natural eyebrows that can be customized to your preference.
The “microblade” is really a set of tiny needles that scrap a shallow well into your existing eyebrows that is then filled with a pigment to “dye” the brows.
By semi permanent I mean that it lasts around 9 to 15 months depending on how oily your skin is and how well you follow aftercare instructions.
Most people who get microbladed feel that the procedure is “worth it”:

Most people who report a bad experience do so because they weren’t happy with the retention or the shape didn’t fit their needs.
This is why it’s SUPER important for you to find the right sytlist!
Your stylist should create the perfect set of brows based on what YOU want.
This means creating them from scratch and not using a stencil to pencil them on to your face (more on this in a minute).
What’s Included in the Price
The microblading procedure includes at least TWO visits.
And BOTH procedures are equally important for long lasting brows.
Usually the microblading price includes BOTH of these visits.
Occasionally you will see microbladers who put a price on their initial visit and then another price for the follow up or touch up visit.
If you want long lasting results you will need to do BOTH visits.
The initial visit allows for the placement of the pigment, but the touch up “seals” it in making the results last a LONG time (up to 15 months).
The touch up also gives your artist to make your brows pristine by making any changes that you may not have liked on the initial visit.
So what’s included in the price?
- Initial microblading visit (around 2.5 to 3 hours)
- Follow up or touch up visit (around 60 to 90 minutes)
What About Microblading Shading?
Microblading shading is usually NOT included in the price quoted for the microblading procedure.
The shading procedure is a different but similar procedure that is sometimes lumped together when we talk about microblading but it is different.
Microblading is the art of placing eyebrow like strokes on the skin, this procedure feels like a tugging or pulling motion.
Microblading shading often accompanies microblading but it is the art of creating a powder filled look on the brows by using a stippling method, it feels like you are tapping on the skin.
Shading is done by artists who have taken extra training and are competent in this procedure.
If you aren’t familiar with shading, or if you don’t know if you want this procedure, I recommend that you read this article.
People who get shading done do it because it really adds extra dimensions to your brows and makes it look like you have make-up on 24/7.
Because it often requires more training and expertise it is usually more expensive.
Microblading shading is usually another $50 to $100 in each session.
So let’s say that the average microblading cost is $400, you should add another $50 to $100 to that total cost IF you also want shading.
That puts the grand total to anywhere from $450 to $500 on average if you get both procedures done.
Microblading Before & After
So is microblading actually worth it?
I think that depends on what you are looking for.
If you like:
- Waking up with perfect brows
- Not having to worry about shaping your brows each morning
- Having perfect brows while working out or going out
- Having your brows look like you spent 2 hours on them when in reality you spent 5 minutes
- Having your brows look like the picture below:
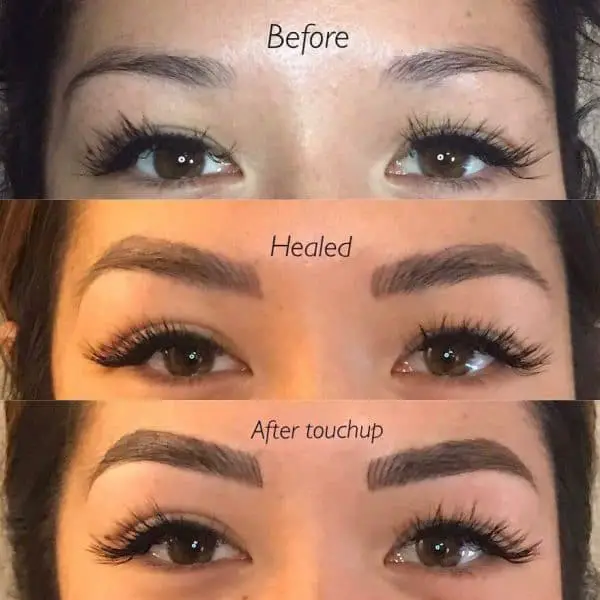
Then microblading is probably something you should consider!
Before you get your brows microbladed make sure you spend a significant amount of time researching the entire procedure.
Like anything you should make sure you know exactly what you are getting yourself into.
I also recommend that you look at several stylists to determine which stylist meets YOUR needs.
Microblading Reviews
All of my clients have been very happy with their decision to get microblading done, so I’ve included some of the texts that I get:
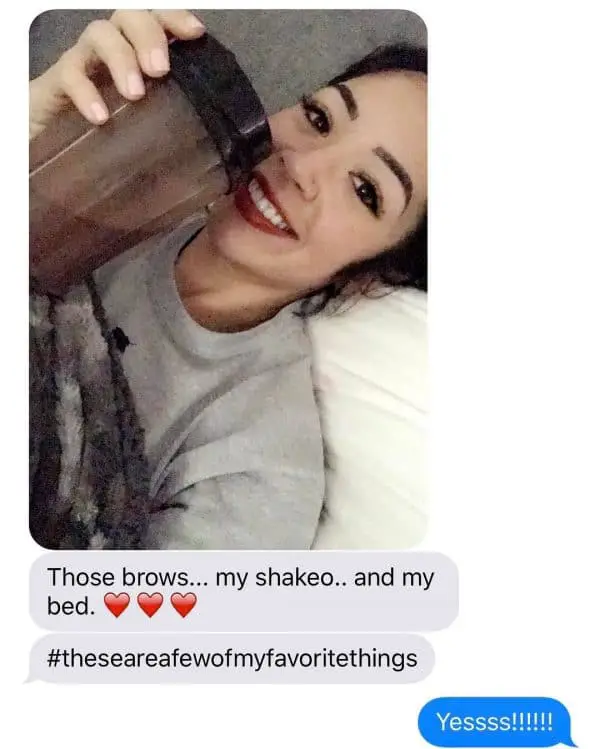
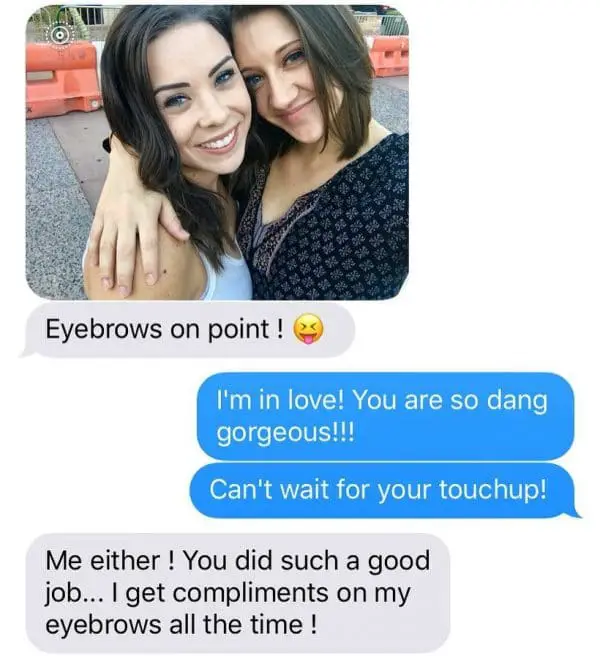
They love the fact that their brows look perfect while laying in bed for selfies or while going out with their friends.
I’ve found that it adds a whole new level to their self confidence.
Some women walk around with low self esteem due to their brows!
If this is you then you should seriously consider getting your brows done because the transformation I’ve seen in my clients has been amazing.
How to find the Perfect Artist for YOU
As I’ve said before it’s VERY important that you find the right stylist for you.
Each stylist will have their own way of doing things and will have a certain “style” to their art.
Some artists use stencils and others create your brows from scratch.
Some artists use dry healing and some use ointment healing.
The list goes on and on.
Each of these factors can slightly impact your results, so it’s very important that you find the perfect artist for you.
The single best thing you can do is look at their work and determine if it fits YOUR style.
Reach out to your stylist and ask them what they are comfortable doing to make sure it fits your needs.
As long as you do this BEFORE your procedure you can walk in knowing that your brows will be perfect when you walk out.
If you have any questions about the process or how to pick out your stylist please leave a comment below!
I am happy to help anyway that I can, and I am happy to point you to artists (even if it isn’t me) to help you get the best result.
My interest is in making women feel beautiful and regaining their self confidence!

Microblading Scabbing: What’s Normal and What Isn’t While Healing
Light scabbing is a normal part of the microblading healing process.
While light scabbing may be normal, heavy scabbing is NOT.
Because the healing process is full of ups and down I’ve created this post about scabbing to help you along the journey.
Learn more about what you should expect in terms of scabbing and how to make sure that your results are 100% perfect below:
What to Expect
Scabbing can be part of the normal healing process after you get your brows microbladed.
What can freak people out is the fact that when a scab comes off it looks like it takes pigment away with it.
This process leaves a “patchy” appearance to the brows.
Because the microblading healing process has its up and downs I’ve had some of my clients take day-by-day pictures to help illustrate this process:
You can see from the process and images above that scabbing starts occurring around day 5 and persists through day 10.
You can see by day 9 that most of the scabs have fallen off revealing a lighter brow and color.
By day 12 you can see that the brows have lightened and softened up considerably, but they are no longer patchy.
You can also see that the pigment has retained (about 85%).
This is the normal microblading and scabbing healing process.
But let me take a few minutes to answer some basic questions that might help you out:
Why does scabbing occur?
Scabbing is simply a normal part of the healing process.
Microblading requires me (and other artists) to make a small cut into the skin to the level of the dermal epi-dermal junction.
This is the perfect place to set the pigment for lasting results, but also not deep enough to cause scarring or a permanent tattoo.

Scabbing results as part of the normal healing process.
But what if your strokes go too deep?
While some scabbing is normal, heavy scabbing is not.
We will go over this in the infection section below, but for now let me just say that hitting that “sweet” spot is required for optimal results and going too deep may cause deep scabbing.
Is it ok if the scabs fall off?
It is ok as long as the scabs come off NATURALLY and on their own.
While the scabbing process is normal, your scabs may take some of your pigment with them as they fall off.
This is the main reason that you shouldn’t pick your scabs.
Picking your scabs may result in a loss of pigment that may need to be re-applied.
If you have a tendency to “pick” scabs or wounds, then you need to disclose this information to your stylist because they may change your healing process.
How long does the scabbing last?
The entire scabbing process should only last about 5-7 days.
It usually doesn’t start until around day 5 and continues till around day 12.

If you had shading done to your brows in addition to microblading then the scabbing process might start earlier and last a little bit later.
Likewise, if your scabbing is very intense or becomes red/inflamed then it may be an early warning or sign of a developing infection (more on that below).
Should I pick my scabs?
Absolutely not!
Under no circumstances should you be picking or pulling at your scabs.
If you pick off your scabs then you may pull out the pigment along with the scab and then you will run the risk of losing all of the hard work you went through with your first visit.
You MUST let your scabs fall off naturally (no matter how gross it may look or feel!).
If you have an issue with picking scabs/skin/etc. then please let your stylist know prior to your appointment.
Scabbing with dry healing vs ointment healing:
Scabbing using the dry healing method tends to be more noticeable and slightly worse than ointment healing.
My opinion is that dry healing results in a more crisp and beautiful result, but it also requires more patience during the healing process.
Ointment healing usually has less scabbing but your brows may not look quite as crisp.
What if my eyebrows look patchy?
Your brows WILL look patchy throughout the healing process.
And this is NORMAL.
If your brows look patchy and abnormal or uneven after day 12-14 then that is abnormal.
You can see from the picture above that once all the scabs fall off you should still have normal and non patchy brows.
It’s not uncommon for your brows to fade slightly prior to your touch up (this is normal).
On average most people retain about 85% of their brows after their first appointment as long as they follow all of the aftercare instructions.
People who pick their scabs off prematurely may only have a 40-50% retention (which means you may need to start back over).
What if my brows don’t stay after the healing process?
If your brows didn’t “stick” or stay on after the entire healing process then your artist may not have gone deep enough to hit that sweet spot in the dermal epidermal junction.
This is assuming that you followed the aftercare instructions to the “T”.
If your brows didn’t stick after the initial visit then they will need to be re-applied during your touch up visit.
Normal Scabbing vs Infection
While some scabbing is normal you should not be experiencing heavy scabbing.
If you find that your brows are red and inflamed after day 5 with heavy scabbing then you may be developing an infection.
You can read more about evaluating your brows for infection by clicking here.
Infections may also reduce your pigment retention and they need to be treated quickly.
Normal scabbing should be light and flaky.
If your scabbing is heavy, red, inflamed or expresses a discolored pus then these are signs of an early infection.
If you develop this symptoms make sure to call your stylist immediately!
How to Retain your Pigment & Your Results
Remember that as long as you follow your aftercare instructions and avoid picking your scabs off your healing should be PERFECT.
Just make sure that you trust the process and you trust your stylist.
Make sure that you use your intuition during the healing process.
If something feels “off” or doesn’t feel “right” then please reach out to your stylist for further direction.
It’s really easy to snap a picture and send it to them for further evaluation.
It’s worth the small time and effort to ensure that you have perfect brows.
Leave any questions you have about scabbing or the healing process below!
– Kat

The Entire Microblading Healing Process Day-by-Day (with Pictures)
The microblading healing process is filled with ups and downs, no question about it.
But don’t let it scare you:
During the healing process it is NORMAL to experience some scabbing, some patching and even some loss of pigment.
I will walk you through what the process looks like day-by-day including pictures along the way.
This will help visualize what is normal and what isn’t:
The Entire Microblading Healing Process Day by Day
One thing that freaks out my clients is the fact that some scabbing and “flaking” of the pigment is actually quite normal.
Unfortunately it may look like your brows are coming completely off, but don’t let it freak you out because some of it is normal.
Because of this confusing process I’ve created an outline to help you understand what is normal and what isn’t (including daily pictures of the process):
Day 1: I LOVE MY NEWS BROWS! Your brows are fresh, perfect and brand new. What’s not to love?
<img alt=”Microblading healing days 1 through 14″ style=”width: 600px” src=”//browsandbody.com/wp-content/uploads/2017/03/Microblading-healing-days-1-through-14-e1490482015629.jpg” width=”600″ height=”600″ data-attachment-id=”477″>
(You can see how the brows become “patchy” as some scabbing occurs and scabs flake off. During this period it is CRITICAL that you do NOT pick off the scabs because you run the risk of pulling the pigment out.)
Day 2-4: “These are way too dark and thick.” Your brows will actually get darker over this period of time, but don’t freak out! They will lighten again.
Day 5-8: During these days your brows may be flaking and scabbing off. Make sure to NOT pick or remove the scabs or you may inadvertently remove some of your pigment!
Day 9-10: “My brows have completely fallen off!!” Your brows will appear like they are completely gone during this time, but don’t worry – they will still be there! And this is also why it’s important to have your touch up.
Days 11-28: “My brows are coming back but they are patchy!” Your brows will appear to be patch and incomplete during this part of the healing process. Most of these patches will fill in over time but if for some reason some area doesn’t take the touch up will help fill the gap so to speak.
Day 42 (after touch up): “These are better than I could have ever imagined!!!” And now you are back to the way you felt after the first day Trust me when I say that this is a real cycle.
That is basically the process in a nut shell!
As you can see there are definitely lots of up’s and down’s that occur, and if you aren’t ready for them they can definitely cause some stress.
But don’t worry, as long as you listen to the aftercare instructions and follow them to a “T” you won’t have any long term issues.
I will go over my recommendations to get amazing brows below but I want to show you another picture that can further outline what the finished product will look like.
 <img alt=”Microblading healing process 7 weeks” style=”width: 600px” src=”//browsandbody.com/wp-content/uploads/2017/03/Microblading-healing-process-7-weeks-e1490481761634.jpg” width=”600″ height=”600″ data-attachment-id=”473″>
This picture outlines the difference between the initial visit (healed after 7 weeks) and the final product (after the touchup).
Remember that the majority of the pigment gets “glued in” long term after your touch up. (The touch up is required for your brows to stay semi permanent up to 15 months)
One of the benefits of the touch up is to fill in any gaps that may get pulled out as a result of scabbing.
The most important thing you can do is set your expectations up early and TRUST your artist!
It is absolutely critical that you follow your aftercare instructions and trust in your artist to get the best possible result.
Is Scabbing normal after the first visit?
YES!
Scabbing is definitely a normal part of the healing process.
I’m a big fan of dry healing (I think it’s better than ointment healing and you can read about why here).
Ointment healing results in a more crisp and defined brow when everything is said and done, but there is the issue of scabbing.
When using the ointment healing process some of the scabs are “covered” and are less likely to be “picked” off of your face.
The dry healing results in more scabbing (which is ok), but can be more tempting for people that have a tendency to “pick” them off.
Scabbing usually starts around day 5 (after your initial visit) and persists through day 10.
As the scabs naturally fall off it may look like your brow becomes “patchy”.
This is OKAY. Don’t let it freak you out.
Don’t worry if it looks patchy, it will only be temporary.
As long as you don’t pick the scabs off any pigment that is loosened in this process can be reapplied during the touch up.
Why you shouldn’t “pick” your microblading scabs:
The microblading pigment is placed in a shallow well in your brows.
The scabbing and healing process can adhere to the pigment and if you pick it off you are literally pulling the pigment off of your face in the process.
This can basically undo all of the initial work and may result in a longer visit.
If you let the skin heal naturally it will “let go” of the pigment through the process.
It is normal that about 10-15% of the pigment will fall out or fade during the initial healing process, but can be re-applied during the touch up.
(Video of the microblading healing process and what brows look like after 85%+ retention by following all of the after care instructions.)
Microbladed Brows 6 Months Later
I know what your next question will be:
Do the brows actually stay on long term?
The answer is yes, they do!
As long as you follow the aftercare instructions you will get your reward:
Long last perfect brows! (example below)
 <img alt=”Microblading healing process 6 months healed” style=”width: 600px” src=”//browsandbody.com/wp-content/uploads/2017/03/Microblading-healing-process-6-months-healed-1-e1490481963115.jpg” width=”600″ height=”600″ data-attachment-id=”476″>
This picture shows you the difference between fresh microbladed brows and what brows look like 6 months later.
The average length that brows last ranges from 9 to 15 months.
The two biggest factors for brow longevity include:
- Ability to adhere to the microclading aftercare instructions
- Getting in for your touch up within 6 weeks after your initial visit
As long as you do these two things you will ensure that your brows will last.
Some other factors that are out of your control may limit the longevity of your brows, but these aren’t under your control.
Things like: how much oil your skin produces, your hormones and your genetics.
Because you can’t change these factors it’s important to focus on what you CAN change.
Emotional hoops you might go through during the healing process
The physical part of healing is only part of the journey.
Because your brows are such a huge part of your self confidence (in some women) there is also an emotional component that many women go through as they heal.
This is also normal, and I’ve attempted to go over this in detail below:
#1.
Your brows will get much darker and thicker from the time you leave until around day 5.
Be prepared for your brows to look harsh and possibly unnatural during this time period.
If you have a spouse or significant other tell them before hand to keep comments to themselves because even though you’ll know they will heal better it can still be hard since the brows are on YOUR face.
You’ve seen my healed pictures so be patient and know they will look perfect with time!
#2.
After the darkness wears off you’ll start scabbing and flaking, and underneath your skin it’s going to look like there is no pigment left.
Don’t worry: it’s still there and it comes back in with time.
Your skin’s healing process is just that… a process.
You did not go through that entire process for it to all be gone at day 7.
As long as you are following aftercare instructions to the T you have nothing to worry about.
#3.
Around week 3 and 4 when your skin is closer to being complete healed you will notice there are some patches and strokes that didn’t retain as they should have.
Just realize that it’s impossible to get your brows perfect on the first visit.
Which is why everyone needs to have their touch up:
Any missing pieces or strokes we want to fill in will be done at the touch up so please make sure you make this appointment a priority as well.
Without it your brows won’t ever be completely “done”.
At this point (even around week 2 when you are completely scab free) you can put eyebrow makeup on to help even out any missing strokes.
Microblading Do’s and Don’ts
DO’s
- Do only use a baby wipe to touch them
- Do avoid brow area while you wash your face
- Do sleep on your back if possible
- Do put small bandaids on the ends if you are a side sleeper
- Do keep them as BONE DRY as possible
DON’Ts
- Do NOT get them wet
- Do NOT touch them for 24 hours
- Do NOT sweat or workout
- Do NOT put ointment, lotions or makeup on them
- Do NOT stay in direct sunlight or go to a tanning bed
- Do NOT pick, itch or rub your brows
- Do NOT have hair touching your brows (bangs)
- Do NOT use benzoyl peroxide, salicyclic acid, or retinoids
- Do NOT use a sauna
Following these basic Do’s and Dont’s will help you achieve the best results possible.
Remember that during this healing process your worst enemy is anything that can get into your brows and up root the pigment.
That means things like sweat, lotions, creams, etc.
Stay away from these as your brows heal.
Another important factor, which is somewhat out of your control, is infection.
Infection can cause issues with pigment retention but shouldn’t be a big problem if you follow the aftercare instructions.
You can read more about microblading infection by clicking here.
Back to you:
Remember that the microblading healing process takes time and requires a fair amount of patience and trust on your part!
But trust me when I say that it will all be worth it.
But I want to hear from you.
Did you have any issues with the healing process? Did your scabbing or flaking freak you out?
Leave your comments below!

Microblading Aftercare – Do’s and Don’ts + Instructions for Best Results
Following your microblading aftercare instructions is incredibly important for best results!
If you don’t follow the instructions 100% you risk reducing the length of your results and may increase your risk of infection.
Use these guidelines for the BEST possible results after your microblading procedure:
Microblading After Care Do’s and Don’ts
DO’s
- Do only use a baby wipe to touch them
- Do avoid brow area while you wash your face
- Do sleep on your back if possible
- Do put small bandaids on the ends if you are a side sleeper
- Do keep them as BONE DRY as possible
DON’Ts
- Do NOT get them wet
- Do NOT touch them for 24 hours
- Do NOT sweat or workout
- Do NOT put ointment, lotions or makeup on them
- Do NOT stay in direct sunlight or go to a tanning bed
- Do NOT pick, itch or rub your brows
- Do NOT have hair touching your brows (bangs)
- Do NOT use benzoyl peroxide, salicyclic acid, or retinoids
- Do NOT use a sauna
By following these simple steps you can and will enjoy long lasting perfect brows.
Just make sure to follow them as close to 100% as possible.
The last thing you want is to spend the 3 hours getting your brows microbladed and then have your results reduced by several months because you wanted to put some make up on or something similar!
I also recommend that you account for the healing process and make sure you don’t have any important dates such as pictures, weddings, etc. during the time you will be healing.
Because the healing process can change day by day, I’ve also included a walk through of what to expect and how long it takes to heal below:
<img alt=”Cindy shaping and after microblading” style=”width: 600px” src=”//browsandbody.com/wp-content/uploads/2017/03/Cindy-shaping-and-after-microblading-e1490141202526.jpg” width=”600″ height=”600″ data-attachment-id=”238″>
Day-by-Day Healing Guide & Walk Through
Your microblading healing process can definitely have its ups and downs.
The color may change over time as you heal and as your body accepts the pigment, but trust me when I say you will LOVE your results.
Use this guide so you know that what you are experiencing IS normal and everyone goes through something similar…
Day 1: I LOVE MY NEWS BROWS! Your brows are fresh, perfect and brand new. What’s not to love?
Day 2-4: “These are way too dark and thick.” Your brows will actually get darker over this period of time, but don’t freak out! They will lighten again.
Day 5-8: During these days your brows may be flaking and scabbing off. Make sure to NOT pick or remove the scabs or you may inadvertently remove some of your pigment!
Day 9-10: “My brows have completely fallen off!!” Your brows will appear like they are completely gone during this time, but don’t worry – they will still be there! And this is also why it’s important to have your touch up.
Days 11-28: “My brows are coming back but they are patchy!” Your brows will appear to be patch and incomplete during this part of the healing process. Most of these patches will fill in over time but if for some reason some area doesn’t take the touch up will help fill the gap so to speak.
Day 42 (after touch up): “These are better than I could have ever imagined!!!” And now you are back to the way you felt after the first day 🙂 Trust me when I say that this is a real cycle.
Stick with it though and your results will be amazing:
 <img alt=”Bailey before and after 6 months healed” style=”width: 600px” src=”//browsandbody.com/wp-content/uploads/2017/03/Bailey-before-and-after-6-months-healed-e1490398160186.jpg” width=”600″ height=”600″ data-attachment-id=”365″>
Now that you have some idea what to expect let’s talk about the importance of aftercare and how it will impact your results.
In addition we will go over some of the variations to aftercare and how they may impact your results:
Is aftercare important?
After care is the most important part of the whole service!
The reason is simple:
I can create a beautiful brow but without the proper aftercare your healing and color retention may be less than optimal.
The microblading process requires that I only “scratch” the surface between the dermal and epidermal junction.
This means the depth is not as deep as with a regular tattoo.
There is a sweet spot that must be reached in order for the pigment to be properly placed, if the depth is too shallow the pigment won’t retain.
On the flip side, if I go too deep then we may risk scarring or getting discoloration from the pigment.
Since the pigment isn’t embedded deeply into your skin there are many factors that try to “push” the pigment back to the surface.
That is why I tell my clients they must undergo “dry healing”.
Dry healing is just that:
Healing without the use of any ointments, water, steam, sweat, moisterizers, skin oils, etc.
When I say dry I mean it: BONE DRY.
The reason is that these oils, creams, lotions, etc. will all be trying to get into your microblading wells and push out the pigment (reducing your results).
If you are working out and sweating your sweat will get into the wells we created and try to push the pigment out.
When water gets into your brows from your shower its loosening the pigment and again trying to take its place.
Even your natural facial oils are not ideal during the healing process, but they are a necessary part of the normal healing process.
While I know it is a complete pain in the butt to avoid water during the healing process I promise it will result in the beautiful brows you are looking for.
 <img alt=”laurel split screen microblade before and after” style=”width: 600px” src=”//browsandbody.com/wp-content/uploads/2016/11/laurel-split-screen-microblade-before-after-e1490133573739.jpg” width=”600″ height=”600″ data-attachment-id=”161″>
Why do some technicians do ointment healing and some do dry healing?
I think some of this depends on your training and your preference.
I personally was trained to do aquaphor healing but have since switched to dry healing so I have experience with both.
I did some more research as I started doing my own clients and found the other technicians I admired had crisper and more pigmented results after their clients were completely healed.
While ointment healing with aquaphor can still create beautiful results I believe that dry healing results in the best and most crisp microbladed brows.
When you have ointment on your brows it can:
#1- Sometimes push the pigment out…
#2- And potentially blurs the strokes a little as they heal.
I have found that dry healing brings my clients back for their touchup with an 80-95% retention rate! (which is amazing).
Yes there are always exceptions and I will have a rare client do aquaphor healing but if you come to me be prepared to avoid water like the plague and endure dry healing.
What can I expect with dry healing?
You can expect them to get thicker and darker for the first 4-6 days.
After that they will start to crack and flake.
DO NOT PICK THEM!
If they are barely hanging on and come off that’s okay but if you are using any force at all you are literally pulling the pigment back out of your brows and risk scarring.
They will probably go through an itchy stage but don’t hate me for this because I promise that once you can wake up with them healed you will be so happy you got this done!
As the scabs/flakes are coming off you might feel like all the color is gone too.
Don’t worry:
The pigment is NOT gone and will come back as it heals.
There might be some patchy areas here and there (average retention is about 85%) but we will fill in any gaps during the touch up.
Emotional Healing
The healing process isn’t limited to just physical healing.
Some people don’t even think about the emotional process that goes on during this time period.
Some people handle it completely fine and some people cry and wonder what in the world they did to their brows.
Just know IT. IS. COMPLETELY. NORMAL.
After your brows are done they get darker and more full for a while then start flaking off leaving them “patchy” and light.
Please please don’t judge your brows until they are completely healed.
Even before your touchup they will still need some tweaking to make them perfect and this is normal.
I’ve had clients cry tears of joy after the initial appointment but I’ve also had some clients cry during the healing process wondering if they made a mistake.
I am not writing this part to scare you, but to educate you that you aren’t the only one freaking out.
It is a complete process but so worth it in the end.
My clients have said it has boosted confidence in so many ways and their only regret is that they didn’t do it sooner.
Back to you
As long as you follow the aftercare instructions to the letter you will have amazing results.
Remember that this is probably the single most important part of the entire microblading process so make sure to follow it!
As always, please let me know if you have any questions.
– Kat

30 Beautiful Microblading Before and After Pictures from Real Clients
Microblading is the art of applying semi permanent brows to your current set of brows using special pigment.
Microblading creates a beautiful and perfectly shaped brow that looks make-up ready without any fuss or hassle.
The entire procedure lasts around 3-4 hours and afterwards you walk out with perfect brows that will last up to 15 months before they start fading.
Do you want to see some real microblading before and after pictures from real clients? If so read on:

More…
Microblading before and after pictures:
#1.

Microblading can instantly add dimension and depth to your face.
This particular client started with very blond eyebrows that were difficult to see but afterwards she has a stunning result that acts almost as an instant eye lift.
I forgot the before picture but you the initial picture outlines exactly what her natural brows look like.
#2.
When done correctly microblading heals in a very natural way.
This client now has the gift of sleeping 20 more minutes each morning because she wakes up looking put together.
This example also gives you an idea of what your brows might look like 6 months after the initial appointment.
You can find more information on how to extend your results here.
#3.

Progress pictures always help to visualize the process.
This picture shows her before picture with very little natural brows, her picture after her initial visit, her healed (but before her touch up) and finally her brows after her touch up.
You can easily see the transformation of her brows over 2 months.
#4.

With microblading you have complete control over what your brows look like BEFORE we add the pigment.
Together (with your stylist) you will sit down and shape out your brows and define your arch, length and whatever else you prefer.
After you have decided the shape that you want THEN the pigment and microblading process begins.
#5.

Your initial appointment lasts around 3 hours, the actual microblading process is only about 1 hour.
The first 2 hours are spent shaping your brows to fit your face.
The last hour is spent doing the microblading process to each brow.
The final product is what you see!
#6.

Your eyebrows should be shaped free hand and without a stencil for best results.
Make sure to find a stylist that is comfortable doing it this way because using a stencil may result in a brow that doesn’t fit the dimensions of your face.
#7.

She healed beautifully before the touchup! You can tell the color softens so much throughout the healing process.
#8.

Thank goodness for selfies when you forget to take pictures of them healed! They soften so much once healed.
Lots of women worry they will be so dark and so thick and during the initial healing they WILL feel that way. But this client like many come back at the touchup and ask to go a bit darker!
I promise you my ultimate goal in doing your brows is to have people compliment you without knowing it’s your brows that have changed. I know the initial result can feel like a shock. But trust me if you pick me to be your artist you will have gorgeous natural brows that compliment your bone structure have a color that is completely natural
#9.

Most of my clients are surprised by the fact that many people notice something different about them after the microblading procedure but they are sure what.
They end up getting compliments for looking “put together” even without having make up on.
#10.

The complexion and color of your skin can change what type of pigment that we decide to use.
It’s very important that you find a stylist with understanding of proper color theory for best results. +
#11.

It’s easy to see the subtle differences in this split screen.
Her before is on the left side of the screen and her after is on the right side of the screen.
#12.

I try to make the procedure as comfortable as possible by using special numbing cream before we do any of the microblading.
This numbing cream has lidocaine in it which we place over the brows and let it sit for 20 minutes before we start the procedure.
This helps reduce the discomfort of the microblade itself (which is really just a grouping of needles).
Some patients are more sensitive than others, but the majority of the time pain is not an issue.
#13.

Scared of needles? Don’t worry!
The microblade itself is very tiny and consists of several tiny little needles.
The blade makes a well in your brow that we fill with pigment and because the application is semi permanent it means we don’t have to go as deep as a real tattoo.
People who have had tattoo’s done and microblading done say that microblading is easier than getting a tattoo.
#14.

Together we will pick out the pigment that best matches your skin color and your goal for your brows.
Some women want a darker, more prominent color for their brows and others prefer a subtle approach.
Either way, we have many options!
#15.

You can even microblade over a previous brow tattoo.
The difference is huge as you can see above.
Make sure to let your stylist know that you’ve had a previous tattoo.
#16.

It’s a good idea to get regular brow waxing every 6 weeks after you microblade your brows.
Waxing can help keep your brows looking pristine and perfectly shaped!
#17.


It might help to visualize the before/after process but also to see the brows in a selfie.
I love it when my clients send me selfies of their brows!
#18.

#19.

There will be some fading of your pigment after the first visit and before the touch up.
This is NORMAL.
And this is why it’s so critical to come in for your follow up appointment.
The “second pass” during your follow up appointment will make your results long lasting.
#20.

#21.

Microblading can add a huge boost to your confidence.
I love it when I get to see the explosion of confidence in certain women after they have their brows done.
#22.

Microblading can even help in situations where you’ve lost your brows due to hormonal issues like thyroid problems or even other problems like trichotillomania.
I’ve even done clients after chemotherapy.
#23.

Did you know we can microblade over scars on your face?
We can still place pigment over any scars on your face that may limit any natural growth of your native brows.
One of my clients had a dog bite that permanently scarred one of her brows and we were able to microblade right over it.
#24.
You can get your brows microbladed at any age.
I’ve had 18 year olds come in to get microbladed and I’ve had people as old as 68.
You’re never too young or too old to add dimension to your brows.
#25.

Shading is a way to add thickness and volume to your brows, it also makes them look more natural.
Shading is different than placing strokes and involves different motions with the microblade itself.
Shading will fill in the brow and make it look even more natural.
#26.

Some women are spending up to 2 hours in the morning on their brows!
Wouldn’t it be amazing to cut down that time to 5-10 minutes in the morning?
This is especially true if you find yourself applying a new set of brows EACH and every day.
Not only that but by applying your brows to your face each day you might have some good “brow days” and some bad “brow days”.
With microblading you can make every day a good brow day.
#27.

You’ll be surprised how many compliments you get walking out of the house without make up after you have your brows microbladed.
There’s something about having your brows on point that adds a “put together” look on your face.
#28.

Make sure to find the stylist that best fits YOUR needs and goals.
Before you choose make sure to look at their work and make sure that it matches your style as well.
If you have questions about finding the right artist leave them below! I am happy to help you even if you don’t choose me as your stylist.
#29.

Even if you have very few natural eyebrows we can still create the perfect fit for you.
The shaping process allows us to create an entirely new set of brows that match your face perfectly.
#30.

Leave your questions below!