

Everything You Need to Know About Dermaplaning & If you Should Do it
Dermaplaning can help tighten loose skin, reduce hyperpigmentation and ultimately help your face look younger.
All of these benefits come from a quick and easy procedure which includes a scalpel (but it doesn’t go into your skin!) which is grazed over your skin at an angle.
Learn more about the benefits of dermaplaning, who should and shouldn’t get dermaplaning done and how to boost your results after the procedure:
 <img class=”tve_image” alt=”Complete dermaplaning guide” style=”width: 287px” src=”//browsandbody.com/wp-content/uploads/2017/04/Complete-dermaplaning-guide.png” width=”287″ height=”575″ data-attachment-id=”1044″>
More…
What is Dermaplaning & How Does it Work?
Dermaplaning is a quick and painless procedure that involves using a surgical scalpel (yes just like a surgeon!) to exfoliate and remove dead skin cells right off of your face.
The scalpel is NOT used to enter into the skin, instead it is placed at a 45 degree angle to the skin and is brushed back and forth over the skin on the face.
The entire procedure usually lasts 20-30 minutes, doesn’t require any anesthetic and provides immediate results.
So how does Dermaplaning work?
Dermaplaning works by mechanically exfoliating your skin.
What that means is your artist will remove excess skin cells and any skin cell debris from your epidermis.
 <img class=”tve_image” alt=”vellus hair and dermaplaning” style=”width: 271px” src=”//browsandbody.com/wp-content/uploads/2017/04/vellus-hair-and-dermaplaning.png” width=”271″ height=”466″ data-attachment-id=”690″>
This process will also remove vellus hairs from your face (the white peach fuzz).
The process of removing dead skin cells and scraping off the top portion of the epidermis is stimulating to the deeper layers of your skin (the dermis).
The process results in a stimulating effect which causes your skin to produce more collagen which increases skin tightness and skin texture.
The result?
Making your skin look younger, tighter and more beautiful.
Dermaplaning can be done as frequently as once per month.
Another huge benefit to doing dermplaning is that you can also add growth serums and other therapies to help boost your results and improve your skin even further.
Dermplaning is often accompanied with a facial and special growth serums including vitamin A and C can be added after your procedure to help maintain your results (more on those below).
Why should you consider using dermaplaning or other therapies that help exfoliate?
Well one of the big problems with aging is that your body exfoliates less and less.
This process results in a build up of dead skin cells requiring that you either remove those skin cells yourself or use a mechanical device to help remove the dead cells for you.
The process of removing this excess skin stimulates new epidermal growth (the top layer of your skin) and creates more growth factors and collagen that all boost the appearance of your skin.
The stimulation allows promotes an even distribution of melanin (which provides pigment to your skin), this is how dermaplaning can alter pigmentation – especially if used in conjunction with chemical peels.
This process generally takes 3-5 days to produce the maximum benefit, but dermaplaning does provide you with an immediate change to skin texture as well.
Remember that it takes around 40-50 days for your epidermis to “turn over” so you don’t want to get this procedure done more often than once a month or so.
Benefits of Dermaplaning:
- Quick and immediate results – your skin will look soft, fresh and clean immediately after the procedure
- No downtime after the procedure, you will be able to walk out of the office and head straight to work
- Helps to mechanically exfoliate the upper epidermis of your skin and remove both white vellus (peach fuzz) from your face and any dead skin cells
- Provides immediate skin tightening and collagen production
- Helps skin look younger and fresh
- Does not cause hair to grow back darker or thicker
- Can be combined with other procedures like facials, and growth serums for better results
- More aggressive therapy than microdermabrasion, so results will be slightly quicker than using this exofliative method
Now that you know WHY it helps, let’s talk about what conditions it can be used for…
What conditions does it help?
Probably the single most common reason for getting dermaplaning done is for the anti-aging effects.
Anti-aging is NOT the process of reversing the damage that is already present in your skin, instead it is more about preventing further damage from occurring.
Many people don’t realize that with some very basic therapies like facials, dermaplaning and growth serums that they can almost halt the aging process in its tracks.
Have you ever seen a woman in her 50’s who looks like she’s in her 40’s?
THIS is what anti-aging is about.
But beyond the fact that dermplaning makes your skin look young and fresh, it can also be used for other purposes and conditions:
- Aging or loose skin
- Provides texture and increased quality to the skin
- Helps exfoliate and may help reduce occurrence of breakouts
- Can be combined with chemical peels to treat acne scarring, photodamage, melasma, hyperpigmentation or dyschromia and even acne (but dermaplaning shouldn’t be used with ACTIVE break outs)
Despite these benefits there are some people who shouldn’t get dermaplaning done:
People with very fair or light skin or people who are VERY sensitive should think twice before getting this procedure.
That usually means people on in the Fitzpatrick type 1-2 range:
 <img class=”tve_image” alt=”fitzpatrick scale for dermaplaning” style=”width: 731px” src=”//browsandbody.com/wp-content/uploads/2017/04/fitzpatrick-scale-for-dermaplaning.png” width=”731″ height=”156″ data-attachment-id=”696″>
Most people who have sensitive are aware of it and know that they react to certain creams, lotions and procedures.
Because dermplaning is more exfoliative than microdermabrasion, the process may leave some people with sensitive skin with “razor burn” on their face.
Some sensitive patients may also get slightly swollen or “puffy” after the procedure.
Boost your results with growth serums and Vitamin A + C:
When it comes to your skin, and to get the best results, you really want to use a technique known as “layering”.
This idea involves the use of multiple therapies, that each work in tandem with one another, to achieve the best results.
When this is done correctly the outcome becomes multiplicative!
For instance:
Dermplaning on its own will provide some noticeable benefit to your face.
The combination of dermplaning plus chemical peels will provide even more (quicker and more lasting results).
The combination of Dermplaning plus chemical peels plus topical agents takes it to the next level.
For this reason I have included my personal favorite (the one I use) healing serum to help increase your results:
How to Use iS Clinical Pro Heal Serum After Dermaplaning
Overall rating:
Overall Quality
VERY high quality with a pure form of Vitamin C
Price
Price is high, but well worth it
Personal Rating
Can be “layered” with other products for more benefit (I use this product daily)
Who should use it:
Ingredients:
- People with photo damaged skin or with sun spots
- People with aging skin (pretty much anyone over age 30)
- People with very sensitive skin
- People who are layering multiple products
- L-Ascorbic Acid
- Retinol
- Bioflavinoids
- Olive leaf extract
- Tocopherol
How to use it:
Why it works
- Apply 2-4 drops directly to your face after cleansing
- Spread evening throughout your face and to your neck line
- Avoid placing product in the eyes or in any orifice
- Use in the morning if using active serum in the evening
- Contains anti oxidants like Vitamin C, olive leaf extract and bioflavinoids
- Contains vitamin A which has been proven to reduce fine lines and aging
- Contains vitamin E which prevents photo damage
Recommended product:
 <img class=”tve_image” alt=”is clinical vitamin c serum pro heal” style=”width: 294px” src=”//browsandbody.com/wp-content/uploads/2017/04/is-clinical-vitamin-c-serum-pro-heal.png” width=”294″ height=”305″ data-attachment-id=”1494″>See more reviews here
Dermaplaning and Acne
A quick note:
Dermaplaning should not be done if you are having active break outs or cystic acne.
If you fall into this category then a better option for exfoliation would be a more gentle mechanical exfoliative like what can be achieved with the clarisonic, or with chemical peels and/or facials.
While dermplaning can help PREVENT future breakouts, it’s not necessarily ideal for someone with acne currently.
Once you get your acne under control you can come back to dermaplaning to help promote collagen control and use it in conjunction with chemical peels to reduce scarring from acne.
Dermaplaning Before and After
This is an example of me getting dermaplaned:
I’ve also included a shortened video of the entire procedure:
I never talk about a procedure until I’ve had it done to myself, like the results I got and understand the research behind it.
Obviously there will be differences in terms of what beneficial effects you may see in your body, but I find that my skin is so much softer afterwards.
I also found that it help with my acne (especially due to hormones).
But as always, your mileage may vary.
How much does it cost?
Dermaplaning will run you around $ 100-200 per visit.
The average price at high end salons is around the $175 mark, but you can certainly get great results without going to a high end salon.
As long as you undergo the proper aftercare with healing serums it would be better to find a cheaper place to cover that cost.
The combination of dermaplaning plus growth serum will do more for you than just one by itself.
From a technical standpoint dermaplaning is relatively easy to pick up and there isn’t a high degree of variance between artists (compared to something like botox or dermal fillers).
Does it hurt?
Dermaplaning should cause only MILD discomfort at the most.
The majority of patients have no issues in terms of pain after the procedure, however some may have slight “puffiness” or slight “redness” – these clients usually have more tender and sensitive skin.
You do NOT need topical anesthetic prior to this procedure.
Back to you
Dermaplaning is a therapy which can help promote collagen production and epidermal growth factors which may directly result in an improvement in skin tone and pigmentation.
This procedure is primarily for people interested in anti-aging but it has more benefits beyond this!
Make sure to “layer” your dermaplaning with other therapies for maximum benefit and get some kind of Vitamin a + vitamin C based serum after your procedure (this will maximize your benefits).
And finally – make sure you find an artist that you trust and has your best interests at heart!
Now it’s your turn:
Have you had dermaplaning done?
Did it work for you?
Why or why not?
Leave your comment below!

Microblading Cost & Price Range: Is it Worth it?
Full disclosure:
I’m obsessed with microblading and anything related to eyebrows.
So obviously I think that microblading is definitely worth it, but I want to give you an honest opinion and give you some ideas as to who I think should get microblading done, if it’s worth it and how much it costs:
More…
How much does Microblading Cost?
Microblading ranges in cost from around $350 dollars to as high as $800 dollars.
The average microblading cost is around $400.
If you don’t know what microblading is, it’s the practice of placing pigment with tiny strokes of a “microblade” in a semi permanent fashion over your existing eyebrows.
The procedure results in beautiful and very natural eyebrows that can be customized to your preference.
The “microblade” is really a set of tiny needles that scrap a shallow well into your existing eyebrows that is then filled with a pigment to “dye” the brows.
By semi permanent I mean that it lasts around 9 to 15 months depending on how oily your skin is and how well you follow aftercare instructions.
Most people who get microbladed feel that the procedure is “worth it”:

Most people who report a bad experience do so because they weren’t happy with the retention or the shape didn’t fit their needs.
This is why it’s SUPER important for you to find the right sytlist!
Your stylist should create the perfect set of brows based on what YOU want.
This means creating them from scratch and not using a stencil to pencil them on to your face (more on this in a minute).
What’s Included in the Price
The microblading procedure includes at least TWO visits.
And BOTH procedures are equally important for long lasting brows.
Usually the microblading price includes BOTH of these visits.
Occasionally you will see microbladers who put a price on their initial visit and then another price for the follow up or touch up visit.
If you want long lasting results you will need to do BOTH visits.
The initial visit allows for the placement of the pigment, but the touch up “seals” it in making the results last a LONG time (up to 15 months).
The touch up also gives your artist to make your brows pristine by making any changes that you may not have liked on the initial visit.
So what’s included in the price?
- Initial microblading visit (around 2.5 to 3 hours)
- Follow up or touch up visit (around 60 to 90 minutes)
What About Microblading Shading?
Microblading shading is usually NOT included in the price quoted for the microblading procedure.
The shading procedure is a different but similar procedure that is sometimes lumped together when we talk about microblading but it is different.
Microblading is the art of placing eyebrow like strokes on the skin, this procedure feels like a tugging or pulling motion.
Microblading shading often accompanies microblading but it is the art of creating a powder filled look on the brows by using a stippling method, it feels like you are tapping on the skin.
Shading is done by artists who have taken extra training and are competent in this procedure.
If you aren’t familiar with shading, or if you don’t know if you want this procedure, I recommend that you read this article.
People who get shading done do it because it really adds extra dimensions to your brows and makes it look like you have make-up on 24/7.
Because it often requires more training and expertise it is usually more expensive.
Microblading shading is usually another $50 to $100 in each session.
So let’s say that the average microblading cost is $400, you should add another $50 to $100 to that total cost IF you also want shading.
That puts the grand total to anywhere from $450 to $500 on average if you get both procedures done.
Microblading Before & After
So is microblading actually worth it?
I think that depends on what you are looking for.
If you like:
- Waking up with perfect brows
- Not having to worry about shaping your brows each morning
- Having perfect brows while working out or going out
- Having your brows look like you spent 2 hours on them when in reality you spent 5 minutes
- Having your brows look like the picture below:
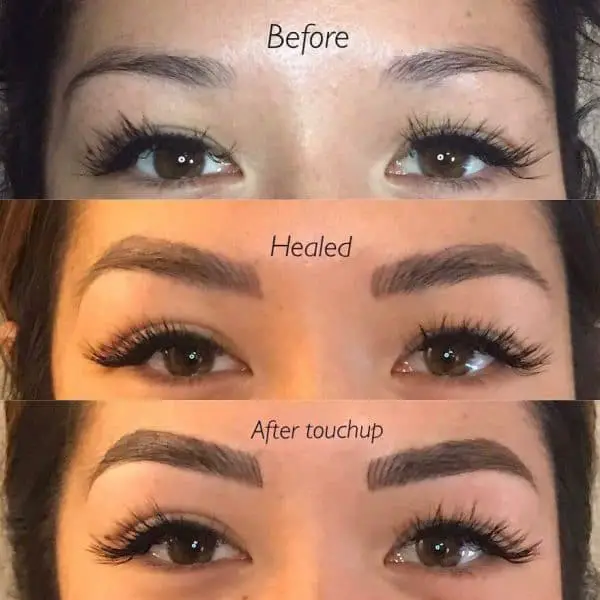
Then microblading is probably something you should consider!
Before you get your brows microbladed make sure you spend a significant amount of time researching the entire procedure.
Like anything you should make sure you know exactly what you are getting yourself into.
I also recommend that you look at several stylists to determine which stylist meets YOUR needs.
Microblading Reviews
All of my clients have been very happy with their decision to get microblading done, so I’ve included some of the texts that I get:
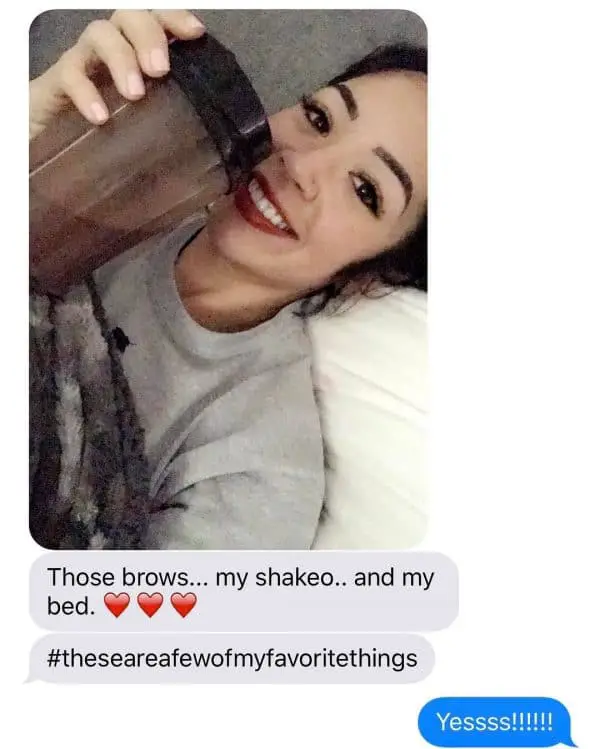
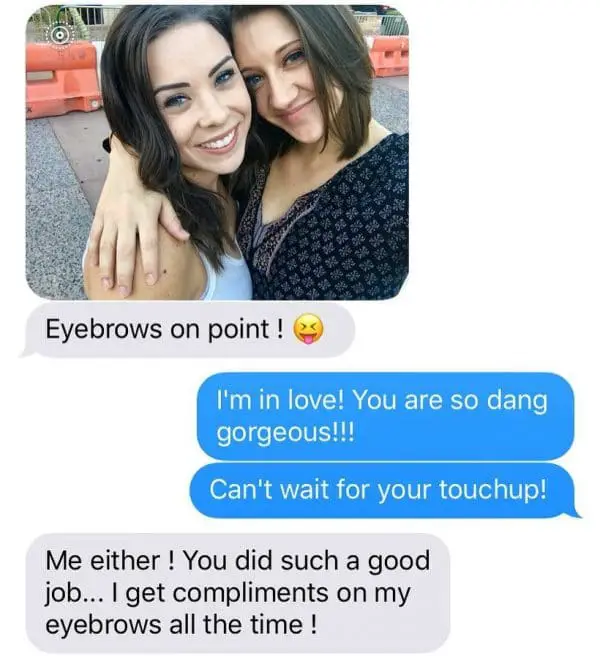
They love the fact that their brows look perfect while laying in bed for selfies or while going out with their friends.
I’ve found that it adds a whole new level to their self confidence.
Some women walk around with low self esteem due to their brows!
If this is you then you should seriously consider getting your brows done because the transformation I’ve seen in my clients has been amazing.
How to find the Perfect Artist for YOU
As I’ve said before it’s VERY important that you find the right stylist for you.
Each stylist will have their own way of doing things and will have a certain “style” to their art.
Some artists use stencils and others create your brows from scratch.
Some artists use dry healing and some use ointment healing.
The list goes on and on.
Each of these factors can slightly impact your results, so it’s very important that you find the perfect artist for you.
The single best thing you can do is look at their work and determine if it fits YOUR style.
Reach out to your stylist and ask them what they are comfortable doing to make sure it fits your needs.
As long as you do this BEFORE your procedure you can walk in knowing that your brows will be perfect when you walk out.
If you have any questions about the process or how to pick out your stylist please leave a comment below!
I am happy to help anyway that I can, and I am happy to point you to artists (even if it isn’t me) to help you get the best result.
My interest is in making women feel beautiful and regaining their self confidence!

Microblading Scabbing: What’s Normal and What Isn’t While Healing
Light scabbing is a normal part of the microblading healing process.
While light scabbing may be normal, heavy scabbing is NOT.
Because the healing process is full of ups and down I’ve created this post about scabbing to help you along the journey.
Learn more about what you should expect in terms of scabbing and how to make sure that your results are 100% perfect below:
What to Expect
Scabbing can be part of the normal healing process after you get your brows microbladed.
What can freak people out is the fact that when a scab comes off it looks like it takes pigment away with it.
This process leaves a “patchy” appearance to the brows.
Because the microblading healing process has its up and downs I’ve had some of my clients take day-by-day pictures to help illustrate this process:

You can see from the process and images above that scabbing starts occurring around day 5 and persists through day 10.
You can see by day 9 that most of the scabs have fallen off revealing a lighter brow and color.
By day 12 you can see that the brows have lightened and softened up considerably, but they are no longer patchy.
You can also see that the pigment has retained (about 85%).
This is the normal microblading and scabbing healing process.
But let me take a few minutes to answer some basic questions that might help you out:
Why does scabbing occur?
Scabbing is simply a normal part of the healing process.
Microblading requires me (and other artists) to make a small cut into the skin to the level of the dermal epi-dermal junction.
This is the perfect place to set the pigment for lasting results, but also not deep enough to cause scarring or a permanent tattoo.

Scabbing results as part of the normal healing process.
But what if your strokes go too deep?
While some scabbing is normal, heavy scabbing is not.
We will go over this in the infection section below, but for now let me just say that hitting that “sweet” spot is required for optimal results and going too deep may cause deep scabbing.
Is it ok if the scabs fall off?
It is ok as long as the scabs come off NATURALLY and on their own.
While the scabbing process is normal, your scabs may take some of your pigment with them as they fall off.
This is the main reason that you shouldn’t pick your scabs.
Picking your scabs may result in a loss of pigment that may need to be re-applied.
If you have a tendency to “pick” scabs or wounds, then you need to disclose this information to your stylist because they may change your healing process.
How long does the scabbing last?
The entire scabbing process should only last about 5-7 days.
It usually doesn’t start until around day 5 and continues till around day 12.

If you had shading done to your brows in addition to microblading then the scabbing process might start earlier and last a little bit later.
Likewise, if your scabbing is very intense or becomes red/inflamed then it may be an early warning or sign of a developing infection (more on that below).
Should I pick my scabs?
Absolutely not!
Under no circumstances should you be picking or pulling at your scabs.
If you pick off your scabs then you may pull out the pigment along with the scab and then you will run the risk of losing all of the hard work you went through with your first visit.
You MUST let your scabs fall off naturally (no matter how gross it may look or feel!).
If you have an issue with picking scabs/skin/etc. then please let your stylist know prior to your appointment.
Scabbing with dry healing vs ointment healing:
Scabbing using the dry healing method tends to be more noticeable and slightly worse than ointment healing.
My opinion is that dry healing results in a more crisp and beautiful result, but it also requires more patience during the healing process.
Ointment healing usually has less scabbing but your brows may not look quite as crisp.
What if my eyebrows look patchy?
Your brows WILL look patchy throughout the healing process.
And this is NORMAL.
If your brows look patchy and abnormal or uneven after day 12-14 then that is abnormal.
You can see from the picture above that once all the scabs fall off you should still have normal and non patchy brows.
It’s not uncommon for your brows to fade slightly prior to your touch up (this is normal).
On average most people retain about 85% of their brows after their first appointment as long as they follow all of the aftercare instructions.
People who pick their scabs off prematurely may only have a 40-50% retention (which means you may need to start back over).
What if my brows don’t stay after the healing process?
If your brows didn’t “stick” or stay on after the entire healing process then your artist may not have gone deep enough to hit that sweet spot in the dermal epidermal junction.
This is assuming that you followed the aftercare instructions to the “T”.
If your brows didn’t stick after the initial visit then they will need to be re-applied during your touch up visit.
Normal Scabbing vs Infection
While some scabbing is normal you should not be experiencing heavy scabbing.
If you find that your brows are red and inflamed after day 5 with heavy scabbing then you may be developing an infection.
You can read more about evaluating your brows for infection by clicking here.
Infections may also reduce your pigment retention and they need to be treated quickly.
Normal scabbing should be light and flaky.
If your scabbing is heavy, red, inflamed or expresses a discolored pus then these are signs of an early infection.
If you develop this symptoms make sure to call your stylist immediately!
How to Retain your Pigment & Your Results
Remember that as long as you follow your aftercare instructions and avoid picking your scabs off your healing should be PERFECT.
Just make sure that you trust the process and you trust your stylist.
Make sure that you use your intuition during the healing process.
If something feels “off” or doesn’t feel “right” then please reach out to your stylist for further direction.
It’s really easy to snap a picture and send it to them for further evaluation.
It’s worth the small time and effort to ensure that you have perfect brows.
Leave any questions you have about scabbing or the healing process below!
– Kat

The Entire Microblading Healing Process Day-by-Day (with Pictures)
The microblading healing process is filled with ups and downs, no question about it.
But don’t let it scare you:
During the healing process it is NORMAL to experience some scabbing, some patching and even some loss of pigment.
I will walk you through what the process looks like day-by-day including pictures along the way.
This will help visualize what is normal and what isn’t:
The Entire Microblading Healing Process Day by Day
One thing that freaks out my clients is the fact that some scabbing and “flaking” of the pigment is actually quite normal.
Unfortunately it may look like your brows are coming completely off, but don’t let it freak you out because some of it is normal.
Because of this confusing process I’ve created an outline to help you understand what is normal and what isn’t (including daily pictures of the process):
Day 1: I LOVE MY NEWS BROWS! Your brows are fresh, perfect and brand new. What’s not to love?
<img alt=”Microblading healing days 1 through 14″ style=”width: 600px” src=”//browsandbody.com/wp-content/uploads/2017/03/Microblading-healing-days-1-through-14-e1490482015629.jpg” width=”600″ height=”600″ data-attachment-id=”477″>
(You can see how the brows become “patchy” as some scabbing occurs and scabs flake off. During this period it is CRITICAL that you do NOT pick off the scabs because you run the risk of pulling the pigment out.)
Day 2-4: “These are way too dark and thick.” Your brows will actually get darker over this period of time, but don’t freak out! They will lighten again.
Day 5-8: During these days your brows may be flaking and scabbing off. Make sure to NOT pick or remove the scabs or you may inadvertently remove some of your pigment!
Day 9-10: “My brows have completely fallen off!!” Your brows will appear like they are completely gone during this time, but don’t worry – they will still be there! And this is also why it’s important to have your touch up.
Days 11-28: “My brows are coming back but they are patchy!” Your brows will appear to be patch and incomplete during this part of the healing process. Most of these patches will fill in over time but if for some reason some area doesn’t take the touch up will help fill the gap so to speak.
Day 42 (after touch up): “These are better than I could have ever imagined!!!” And now you are back to the way you felt after the first day Trust me when I say that this is a real cycle.
That is basically the process in a nut shell!
As you can see there are definitely lots of up’s and down’s that occur, and if you aren’t ready for them they can definitely cause some stress.
But don’t worry, as long as you listen to the aftercare instructions and follow them to a “T” you won’t have any long term issues.
I will go over my recommendations to get amazing brows below but I want to show you another picture that can further outline what the finished product will look like.
 <img alt=”Microblading healing process 7 weeks” style=”width: 600px” src=”//browsandbody.com/wp-content/uploads/2017/03/Microblading-healing-process-7-weeks-e1490481761634.jpg” width=”600″ height=”600″ data-attachment-id=”473″>
This picture outlines the difference between the initial visit (healed after 7 weeks) and the final product (after the touchup).
Remember that the majority of the pigment gets “glued in” long term after your touch up. (The touch up is required for your brows to stay semi permanent up to 15 months)
One of the benefits of the touch up is to fill in any gaps that may get pulled out as a result of scabbing.
The most important thing you can do is set your expectations up early and TRUST your artist!
It is absolutely critical that you follow your aftercare instructions and trust in your artist to get the best possible result.
Is Scabbing normal after the first visit?
YES!
Scabbing is definitely a normal part of the healing process.
I’m a big fan of dry healing (I think it’s better than ointment healing and you can read about why here).
Ointment healing results in a more crisp and defined brow when everything is said and done, but there is the issue of scabbing.
When using the ointment healing process some of the scabs are “covered” and are less likely to be “picked” off of your face.
The dry healing results in more scabbing (which is ok), but can be more tempting for people that have a tendency to “pick” them off.
Scabbing usually starts around day 5 (after your initial visit) and persists through day 10.
As the scabs naturally fall off it may look like your brow becomes “patchy”.
This is OKAY. Don’t let it freak you out.
Don’t worry if it looks patchy, it will only be temporary.
As long as you don’t pick the scabs off any pigment that is loosened in this process can be reapplied during the touch up.
Why you shouldn’t “pick” your microblading scabs:
The microblading pigment is placed in a shallow well in your brows.
The scabbing and healing process can adhere to the pigment and if you pick it off you are literally pulling the pigment off of your face in the process.
This can basically undo all of the initial work and may result in a longer visit.
If you let the skin heal naturally it will “let go” of the pigment through the process.
It is normal that about 10-15% of the pigment will fall out or fade during the initial healing process, but can be re-applied during the touch up.
(Video of the microblading healing process and what brows look like after 85%+ retention by following all of the after care instructions.)
Microbladed Brows 6 Months Later
I know what your next question will be:
Do the brows actually stay on long term?
The answer is yes, they do!
As long as you follow the aftercare instructions you will get your reward:
Long last perfect brows! (example below)
 <img alt=”Microblading healing process 6 months healed” style=”width: 600px” src=”//browsandbody.com/wp-content/uploads/2017/03/Microblading-healing-process-6-months-healed-1-e1490481963115.jpg” width=”600″ height=”600″ data-attachment-id=”476″>
This picture shows you the difference between fresh microbladed brows and what brows look like 6 months later.
The average length that brows last ranges from 9 to 15 months.
The two biggest factors for brow longevity include:
- Ability to adhere to the microclading aftercare instructions
- Getting in for your touch up within 6 weeks after your initial visit
As long as you do these two things you will ensure that your brows will last.
Some other factors that are out of your control may limit the longevity of your brows, but these aren’t under your control.
Things like: how much oil your skin produces, your hormones and your genetics.
Because you can’t change these factors it’s important to focus on what you CAN change.
Emotional hoops you might go through during the healing process
The physical part of healing is only part of the journey.
Because your brows are such a huge part of your self confidence (in some women) there is also an emotional component that many women go through as they heal.
This is also normal, and I’ve attempted to go over this in detail below:
#1.
Your brows will get much darker and thicker from the time you leave until around day 5.
Be prepared for your brows to look harsh and possibly unnatural during this time period.
If you have a spouse or significant other tell them before hand to keep comments to themselves because even though you’ll know they will heal better it can still be hard since the brows are on YOUR face.
You’ve seen my healed pictures so be patient and know they will look perfect with time!
#2.
After the darkness wears off you’ll start scabbing and flaking, and underneath your skin it’s going to look like there is no pigment left.
Don’t worry: it’s still there and it comes back in with time.
Your skin’s healing process is just that… a process.
You did not go through that entire process for it to all be gone at day 7.
As long as you are following aftercare instructions to the T you have nothing to worry about.
#3.
Around week 3 and 4 when your skin is closer to being complete healed you will notice there are some patches and strokes that didn’t retain as they should have.
Just realize that it’s impossible to get your brows perfect on the first visit.
Which is why everyone needs to have their touch up:
Any missing pieces or strokes we want to fill in will be done at the touch up so please make sure you make this appointment a priority as well.
Without it your brows won’t ever be completely “done”.
At this point (even around week 2 when you are completely scab free) you can put eyebrow makeup on to help even out any missing strokes.
Microblading Do’s and Don’ts
DO’s
- Do only use a baby wipe to touch them
- Do avoid brow area while you wash your face
- Do sleep on your back if possible
- Do put small bandaids on the ends if you are a side sleeper
- Do keep them as BONE DRY as possible
DON’Ts
- Do NOT get them wet
- Do NOT touch them for 24 hours
- Do NOT sweat or workout
- Do NOT put ointment, lotions or makeup on them
- Do NOT stay in direct sunlight or go to a tanning bed
- Do NOT pick, itch or rub your brows
- Do NOT have hair touching your brows (bangs)
- Do NOT use benzoyl peroxide, salicyclic acid, or retinoids
- Do NOT use a sauna
Following these basic Do’s and Dont’s will help you achieve the best results possible.
Remember that during this healing process your worst enemy is anything that can get into your brows and up root the pigment.
That means things like sweat, lotions, creams, etc.
Stay away from these as your brows heal.
Another important factor, which is somewhat out of your control, is infection.
Infection can cause issues with pigment retention but shouldn’t be a big problem if you follow the aftercare instructions.
You can read more about microblading infection by clicking here.
Back to you:
Remember that the microblading healing process takes time and requires a fair amount of patience and trust on your part!
But trust me when I say that it will all be worth it.
But I want to hear from you.
Did you have any issues with the healing process? Did your scabbing or flaking freak you out?
Leave your comments below!

Microblading Aftercare – Do’s and Don’ts + Instructions for Best Results
Following your microblading aftercare instructions is incredibly important for best results!
If you don’t follow the instructions 100% you risk reducing the length of your results and may increase your risk of infection.
Use these guidelines for the BEST possible results after your microblading procedure:
Microblading After Care Do’s and Don’ts
DO’s
- Do only use a baby wipe to touch them
- Do avoid brow area while you wash your face
- Do sleep on your back if possible
- Do put small bandaids on the ends if you are a side sleeper
- Do keep them as BONE DRY as possible
DON’Ts
- Do NOT get them wet
- Do NOT touch them for 24 hours
- Do NOT sweat or workout
- Do NOT put ointment, lotions or makeup on them
- Do NOT stay in direct sunlight or go to a tanning bed
- Do NOT pick, itch or rub your brows
- Do NOT have hair touching your brows (bangs)
- Do NOT use benzoyl peroxide, salicyclic acid, or retinoids
- Do NOT use a sauna
By following these simple steps you can and will enjoy long lasting perfect brows.
Just make sure to follow them as close to 100% as possible.
The last thing you want is to spend the 3 hours getting your brows microbladed and then have your results reduced by several months because you wanted to put some make up on or something similar!
I also recommend that you account for the healing process and make sure you don’t have any important dates such as pictures, weddings, etc. during the time you will be healing.
Because the healing process can change day by day, I’ve also included a walk through of what to expect and how long it takes to heal below:
 <img alt=”Cindy shaping and after microblading” style=”width: 600px” src=”//browsandbody.com/wp-content/uploads/2017/03/Cindy-shaping-and-after-microblading-e1490141202526.jpg” width=”600″ height=”600″ data-attachment-id=”238″>
Day-by-Day Healing Guide & Walk Through
Your microblading healing process can definitely have its ups and downs.
The color may change over time as you heal and as your body accepts the pigment, but trust me when I say you will LOVE your results.
Use this guide so you know that what you are experiencing IS normal and everyone goes through something similar…
Day 1: I LOVE MY NEWS BROWS! Your brows are fresh, perfect and brand new. What’s not to love?
Day 2-4: “These are way too dark and thick.” Your brows will actually get darker over this period of time, but don’t freak out! They will lighten again.
Day 5-8: During these days your brows may be flaking and scabbing off. Make sure to NOT pick or remove the scabs or you may inadvertently remove some of your pigment!
Day 9-10: “My brows have completely fallen off!!” Your brows will appear like they are completely gone during this time, but don’t worry – they will still be there! And this is also why it’s important to have your touch up.
Days 11-28: “My brows are coming back but they are patchy!” Your brows will appear to be patch and incomplete during this part of the healing process. Most of these patches will fill in over time but if for some reason some area doesn’t take the touch up will help fill the gap so to speak.
Day 42 (after touch up): “These are better than I could have ever imagined!!!” And now you are back to the way you felt after the first day 🙂 Trust me when I say that this is a real cycle.
Stick with it though and your results will be amazing:
 <img alt=”Bailey before and after 6 months healed” style=”width: 600px” src=”//browsandbody.com/wp-content/uploads/2017/03/Bailey-before-and-after-6-months-healed-e1490398160186.jpg” width=”600″ height=”600″ data-attachment-id=”365″>
Now that you have some idea what to expect let’s talk about the importance of aftercare and how it will impact your results.
In addition we will go over some of the variations to aftercare and how they may impact your results:
Is aftercare important?
After care is the most important part of the whole service!
The reason is simple:
I can create a beautiful brow but without the proper aftercare your healing and color retention may be less than optimal.
The microblading process requires that I only “scratch” the surface between the dermal and epidermal junction.
This means the depth is not as deep as with a regular tattoo.
There is a sweet spot that must be reached in order for the pigment to be properly placed, if the depth is too shallow the pigment won’t retain.
On the flip side, if I go too deep then we may risk scarring or getting discoloration from the pigment.
Since the pigment isn’t embedded deeply into your skin there are many factors that try to “push” the pigment back to the surface.
That is why I tell my clients they must undergo “dry healing”.
Dry healing is just that:
Healing without the use of any ointments, water, steam, sweat, moisterizers, skin oils, etc.
When I say dry I mean it: BONE DRY.
The reason is that these oils, creams, lotions, etc. will all be trying to get into your microblading wells and push out the pigment (reducing your results).
If you are working out and sweating your sweat will get into the wells we created and try to push the pigment out.
When water gets into your brows from your shower its loosening the pigment and again trying to take its place.
Even your natural facial oils are not ideal during the healing process, but they are a necessary part of the normal healing process.
While I know it is a complete pain in the butt to avoid water during the healing process I promise it will result in the beautiful brows you are looking for.
 <img alt=”laurel split screen microblade before and after” style=”width: 600px” src=”//browsandbody.com/wp-content/uploads/2016/11/laurel-split-screen-microblade-before-after-e1490133573739.jpg” width=”600″ height=”600″ data-attachment-id=”161″>
Why do some technicians do ointment healing and some do dry healing?
I think some of this depends on your training and your preference.
I personally was trained to do aquaphor healing but have since switched to dry healing so I have experience with both.
I did some more research as I started doing my own clients and found the other technicians I admired had crisper and more pigmented results after their clients were completely healed.
While ointment healing with aquaphor can still create beautiful results I believe that dry healing results in the best and most crisp microbladed brows.
When you have ointment on your brows it can:
#1- Sometimes push the pigment out…
#2- And potentially blurs the strokes a little as they heal.
I have found that dry healing brings my clients back for their touchup with an 80-95% retention rate! (which is amazing).
Yes there are always exceptions and I will have a rare client do aquaphor healing but if you come to me be prepared to avoid water like the plague and endure dry healing.
What can I expect with dry healing?
You can expect them to get thicker and darker for the first 4-6 days.
After that they will start to crack and flake.
DO NOT PICK THEM!
If they are barely hanging on and come off that’s okay but if you are using any force at all you are literally pulling the pigment back out of your brows and risk scarring.
They will probably go through an itchy stage but don’t hate me for this because I promise that once you can wake up with them healed you will be so happy you got this done!
As the scabs/flakes are coming off you might feel like all the color is gone too.
Don’t worry:
The pigment is NOT gone and will come back as it heals.
There might be some patchy areas here and there (average retention is about 85%) but we will fill in any gaps during the touch up.
Emotional Healing
The healing process isn’t limited to just physical healing.
Some people don’t even think about the emotional process that goes on during this time period.
Some people handle it completely fine and some people cry and wonder what in the world they did to their brows.
Just know IT. IS. COMPLETELY. NORMAL.
After your brows are done they get darker and more full for a while then start flaking off leaving them “patchy” and light.
Please please don’t judge your brows until they are completely healed.
Even before your touchup they will still need some tweaking to make them perfect and this is normal.
I’ve had clients cry tears of joy after the initial appointment but I’ve also had some clients cry during the healing process wondering if they made a mistake.
I am not writing this part to scare you, but to educate you that you aren’t the only one freaking out.
It is a complete process but so worth it in the end.
My clients have said it has boosted confidence in so many ways and their only regret is that they didn’t do it sooner.
Back to you
As long as you follow the aftercare instructions to the letter you will have amazing results.
Remember that this is probably the single most important part of the entire microblading process so make sure to follow it!
As always, please let me know if you have any questions.
– Kat

30 Beautiful Microblading Before and After Pictures from Real Clients
Microblading is the art of applying semi permanent brows to your current set of brows using special pigment.
Microblading creates a beautiful and perfectly shaped brow that looks make-up ready without any fuss or hassle.
The entire procedure lasts around 3-4 hours and afterwards you walk out with perfect brows that will last up to 15 months before they start fading.
Do you want to see some real microblading before and after pictures from real clients? If so read on:

More…
Microblading before and after pictures:
#1.

Microblading can instantly add dimension and depth to your face.
This particular client started with very blond eyebrows that were difficult to see but afterwards she has a stunning result that acts almost as an instant eye lift.
I forgot the before picture but you the initial picture outlines exactly what her natural brows look like.
#2.
When done correctly microblading heals in a very natural way.
This client now has the gift of sleeping 20 more minutes each morning because she wakes up looking put together.
This example also gives you an idea of what your brows might look like 6 months after the initial appointment.
You can find more information on how to extend your results here.
#3.

Progress pictures always help to visualize the process.
This picture shows her before picture with very little natural brows, her picture after her initial visit, her healed (but before her touch up) and finally her brows after her touch up.
You can easily see the transformation of her brows over 2 months.
#4.

With microblading you have complete control over what your brows look like BEFORE we add the pigment.
Together (with your stylist) you will sit down and shape out your brows and define your arch, length and whatever else you prefer.
After you have decided the shape that you want THEN the pigment and microblading process begins.
#5.

Your initial appointment lasts around 3 hours, the actual microblading process is only about 1 hour.
The first 2 hours are spent shaping your brows to fit your face.
The last hour is spent doing the microblading process to each brow.
The final product is what you see!
#6.

Your eyebrows should be shaped free hand and without a stencil for best results.
Make sure to find a stylist that is comfortable doing it this way because using a stencil may result in a brow that doesn’t fit the dimensions of your face.
#7.

She healed beautifully before the touchup! You can tell the color softens so much throughout the healing process.
#8.

Thank goodness for selfies when you forget to take pictures of them healed! They soften so much once healed.
Lots of women worry they will be so dark and so thick and during the initial healing they WILL feel that way. But this client like many come back at the touchup and ask to go a bit darker!
I promise you my ultimate goal in doing your brows is to have people compliment you without knowing it’s your brows that have changed. I know the initial result can feel like a shock. But trust me if you pick me to be your artist you will have gorgeous natural brows that compliment your bone structure have a color that is completely natural
#9.

Most of my clients are surprised by the fact that many people notice something different about them after the microblading procedure but they are sure what.
They end up getting compliments for looking “put together” even without having make up on.
#10.

The complexion and color of your skin can change what type of pigment that we decide to use.
It’s very important that you find a stylist with understanding of proper color theory for best results. +
#11.

It’s easy to see the subtle differences in this split screen.
Her before is on the left side of the screen and her after is on the right side of the screen.
#12.

I try to make the procedure as comfortable as possible by using special numbing cream before we do any of the microblading.
This numbing cream has lidocaine in it which we place over the brows and let it sit for 20 minutes before we start the procedure.
This helps reduce the discomfort of the microblade itself (which is really just a grouping of needles).
Some patients are more sensitive than others, but the majority of the time pain is not an issue.
#13.

Scared of needles? Don’t worry!
The microblade itself is very tiny and consists of several tiny little needles.
The blade makes a well in your brow that we fill with pigment and because the application is semi permanent it means we don’t have to go as deep as a real tattoo.
People who have had tattoo’s done and microblading done say that microblading is easier than getting a tattoo.
#14.

Together we will pick out the pigment that best matches your skin color and your goal for your brows.
Some women want a darker, more prominent color for their brows and others prefer a subtle approach.
Either way, we have many options!
#15.

You can even microblade over a previous brow tattoo.
The difference is huge as you can see above.
Make sure to let your stylist know that you’ve had a previous tattoo.
#16.

It’s a good idea to get regular brow waxing every 6 weeks after you microblade your brows.
Waxing can help keep your brows looking pristine and perfectly shaped!
#17.


It might help to visualize the before/after process but also to see the brows in a selfie.
I love it when my clients send me selfies of their brows!
#18.

#19.

There will be some fading of your pigment after the first visit and before the touch up.
This is NORMAL.
And this is why it’s so critical to come in for your follow up appointment.
The “second pass” during your follow up appointment will make your results long lasting.
#20.

#21.

Microblading can add a huge boost to your confidence.
I love it when I get to see the explosion of confidence in certain women after they have their brows done.
#22.

Microblading can even help in situations where you’ve lost your brows due to hormonal issues like thyroid problems or even other problems like trichotillomania.
I’ve even done clients after chemotherapy.
#23.

Did you know we can microblade over scars on your face?
We can still place pigment over any scars on your face that may limit any natural growth of your native brows.
One of my clients had a dog bite that permanently scarred one of her brows and we were able to microblade right over it.
#24.
You can get your brows microbladed at any age.
I’ve had 18 year olds come in to get microbladed and I’ve had people as old as 68.
You’re never too young or too old to add dimension to your brows.
#25.

Shading is a way to add thickness and volume to your brows, it also makes them look more natural.
Shading is different than placing strokes and involves different motions with the microblade itself.
Shading will fill in the brow and make it look even more natural.
#26.

Some women are spending up to 2 hours in the morning on their brows!
Wouldn’t it be amazing to cut down that time to 5-10 minutes in the morning?
This is especially true if you find yourself applying a new set of brows EACH and every day.
Not only that but by applying your brows to your face each day you might have some good “brow days” and some bad “brow days”.
With microblading you can make every day a good brow day.
#27.

You’ll be surprised how many compliments you get walking out of the house without make up after you have your brows microbladed.
There’s something about having your brows on point that adds a “put together” look on your face.
#28.

Make sure to find the stylist that best fits YOUR needs and goals.
Before you choose make sure to look at their work and make sure that it matches your style as well.
If you have questions about finding the right artist leave them below! I am happy to help you even if you don’t choose me as your stylist.
#29.

Even if you have very few natural eyebrows we can still create the perfect fit for you.
The shaping process allows us to create an entirely new set of brows that match your face perfectly.
#30.

Leave your questions below!

How Long Does Microblading Last? & How to Get Lasting Results!
There’s no question that microblading can add a vibrant change to your brows.
But the question is:
How long will it last? and is it worth your time?
The results last anywhere from 9 to 15 months depending on several factors which makes the 3-4 hours it takes to place the brows worth it for sure.
As someone who does microblading I have to answer with the obvious YES it’s so worth it! But allow me to explain why:
More…
How to make sure you get lasting results
One of the biggest advantages to doing microblading is that you get all of the advantages of a tattoo without the permanent aspect.
That’s why microblading is considered to be semi-permanent.
And by semi-permanent I mean it lasts about 9 to 15 months.
The microblading procedure involves placing pigment in the dermal/epidermal junction which makes the pigment stay there, but not forever.
One of the benefits of not going as deep as a tattoo is the fact that it WILL eventually fade over time. Which can be helpful if you decide you don’t want to continue with the brows after 1-2 years or decide you want to change colors.
Another reason it’s beneficial for your brows to fade is as we age gravity plays a roll in our skin, so we don’t want brows on our face that fit us in our 20’s but in our 60’s is too low. We can keep changing the shape as your face and style changes.
You can see a perfect example below:
This client started with a small amount of natural brows but we were able to create basically a whole new set in a matter of hours.
But how can she maintain these amazing results?
I’ve included a list of recommendations which can help make your brows last as long as possible:
- Make sure to follow ALL of the aftercare instructions
- Avoid sunlight during the healing process
- Make sure to come in for your touch up within 6 weeks (do NOT forget this part, it is very important for long term results)
- Avoid placing any makeup over your brows while healing
- Make sure to continue with waxing every 6-8 weeks to maintain your brow shape after your procedure
- During the healing process make sure to eat as healthy as possible and consume as much water as possible to maintain hydration of the skin (you can also consider supplements to boost the healing process as well)
By following these simple rules you can dramatically increase the longevity of your results.
If you don’t follow these rules then you will still have results, but they may fade sooner than you anticipate.
For instance, your brows may fade in 6 to 9 months instead of 9 to 15 months.
What will reduce your results:
What factors will reduce the length of your results?
Some factors are in your control, and others may not be.
Factors within your control:
- Nutritional status (vitamin status and how healthy you eat can influence how you heal)
- Hydration of the skin (meaning you want to be drinking PLENTY of water)
- How closely you follow aftercare instructions (avoiding make up, sun, lotion, etc. on the wound while it is healing
- Smoking (smoking will reduce healing time and make your pigment fade quickly, please avoid smoking during the healing process)
Factors outside of your control:
- The age of your skin (older skin tends to retain pigment less than younger skin)
- Oily skin (the more oily the skin the shorter the results will last)
- Excessive sun damage
- Genetics and issues with immune function
- Hormone imbalances such as hypothyroidism or estrogen dominance can impact pigmentation of the skin
- Medical conditions such as high blood pressure or diabetes
- High levels of stress
By following the recommendations above and by controlling the factors listed in this section you can make your results last for as long as possible.
You can see an example of a client who followed all of the aftercare instructions perfectly below who also has very oily skin:
In the middle section you can see before her touch up that she retained about 85% of her pigment, but there is a huge difference in her brows after her touch up.
This is why being on time for your touch up within 6 weeks of your first appointment is so critical for lasting results.
How Long will Microblading Last Without the Touch up?
The touch-up is an extra procedure which actually helps solidify your shape and helps the procedure last a significant amount of time.
But what if you don’t want the touch-up or what if you can’t afford the touch up? What then?
Well, unfortunately that will definitely reduce the amount of time that your brows will last.
If you do NOT get the touch up then you can expect that your brows will probably only last anywhere from 2-6 months (depending on other factors such as oil production as so on).
So compare the 12-15 months WITH the touch up to the 2-6 months WITHOUT the touch up.
Because this difference is so big I recommend that if you are serious about getting your brows microbladed that you always get the touch up.
What if I want my Brows to Fade?
But what if you want your brows to fade?
What if you don’t like your brows or are unhappy with your results?
Will they still last the 12-15 months?
The answer is yes and no.
If you are unhappy with your results and actually WANT to fade them, then you can take several steps to help this process along.
By using certain steps, which I’ve outlined here, you can reduce the time that the pigment stays in your skin by months.
You can usually help your body push out the pigment over the course of 3-6 months depending on how aggressive you want to be.
I don’t recommend that you jump into this though unless you are 100% certain that you DON’T love your brows!
So make sure you understand what you are getting into if you decide to fade them quickly.
Make sure to find YOUR microblading artist
As always, if you plan on getting your brows microbladed make sure you find the perfect stylist for YOU.
Make sure you look at their work and you find that their style fits your needs.
If you have questions about microblading, about getting results or about my process please leave your questions below!
I am happy to help guide you, even if it is to another stylist.

Microblading Infection: Signs & Symptoms + What to look out for
Having an infection is a rare but potentially serious side effect from getting the microblading procedure done.
You should know that there is a small risk (around 1-3%) that you may have an infection after your procedure.
Most of the time these infections can be treated with over the counter antibiotics that can be topically placed on your skin.
In some serious cases you may need antibiotics, learn more about when you should and shouldn’t be concerned below:
More…
Quick NavigationSigns & Symptoms you may have an infectionOver the counter treatment optionsWatch out for Nickel reaction and RashesNever microblade over a wound, cut, burn or rash! When to see a Doctor
What is “normal” after the microblading procedure?
When talking about an infection it’s important to realize what is normal after your procedure and what is abnormal.
What is considered normal after you procedure?
- Some slight redness or swelling around the eyebrows (swelling that continues beyond 2-3 days may be an early sign of an infection)
- Some tenderness of your eyebrows that may last 2-3 days
- Scabbing of the eyebrows that may last up to 7 days
- Peeling of the skin or darkening of the pigment used
<img class=”tve_image” alt=”Nichole progress picture before and after” style=”width: 640px” src=”//browsandbody.com/wp-content/uploads/2017/03/Nichole-progress-picture-before-and-after.jpg” width=”640″ height=”640″ data-attachment-id=”229″ scale=”0″>
(From the picture above you can see the redness directly around the site of the microbladed brow. Some redness immediately after the procedure is normal but it should subside very soon thereafter.)
These are considered normal changes to your skin after the procedure.
Remember that the microblading procedure does enter into the skin at the dermal-epidermal junction and any procedure that breaks the skin does require healing time.
Likewise any procedure that breaks that skin also carries with it a small risk of infection.
The biggest risk is developing a deep infection of the skin which turns into a condition known as “cellulitis“.
Cellulitis refers to an infection of the inner layer of the skin that can spread if not treated appropriately.
Most infections after your microblading procedure will be limited and can be treated with topical antibiotic creams.
If you do develop cellulitis, however, you will probably need antibiotic treatment.
This condition is hard to miss if you know what you are looking for and we will go over those symptoms below.
But first:
What should you do if you suspect that you have an infection?
The first thing you should do if you think you may have an infection is contact your microblader.
Each microblading artist (much like a Tattoo artist) should have a procedure on how to approach a possible infection.
This includes their recommended topical treatments or referral to a Doctor if necessary.
If they don’t have a procedure to follow then please consider using the recommendations that I use on my clients.
It’s important to note that infections are still VERY rare (in my experience about 1% or 1 in 100 people) but should be treated if you suspect it.
To date I have never had a client have an infection that required the use of oral antibiotics, but I have some some clients who do need temporary use of topical antibiotics.
Signs & Symptoms you may have an infection
Generally you will know if you are developing an infection based on your symptoms.
Below I will go over the most common symptoms on an early infection:
- Odor coming from your eyebrow
- Discharge that may be a greenish/brownish color
- Tenderness when touching(please avoid touching your eyebrows after the procedure!)
- Redness around the procedure site but not extending beyond it
These symptoms are early signs of an infection and may indicate an infection is starting.
At this stage you should contact your microblader and consider the use of topical antibiotics.
If the infection continues it may develop into a more serious infection with these type of symptoms:
- Swelling that extends into the eyelids or other places on the face
- Redness that extends beyond the eyebrow and up into the scalp or cheek area
- Warmth when touching the red areas
- Tenderness and/or pain to your face/eyebrows
- Fever or chills or increase in sweating (signs that suggest you have a systemic infection)
If you start to develop any of these worsening signs then you should see a Doctor ASAP.
These are early signs that you may be developing facial cellulitis and you may need oral or IV antibiotics.
Again, most of these symptoms can be treated as long as you catch it early, but you need to be aware of them.
Over the counter treatment options
If you are noticing the early signs of infection then you should consider using an antibiotic cream.
It’s also important to use other strategies to increase healing time and reduce the risk of developing cellulitis or a worsening infection.
Consider these tips if you have an early infection:
- Consider using an antibiotic ointment like Bacitracin (this is what I use if my clients have issues). Bacitracin will treat the most common skin pathogens such as staph and strep (even MRSA) and does not include ointments that can irritate the skin. This is the ointment that I use.
- Avoid using triple antibiotic ointment like neosporin which contains neomycin that approximately 1 in 10 people react to with a rash (that’s a LOT of people).
- Avoid covering up the microbladed brow with creams and gels such as vaseline or other emollients which can trap in heat and keep an infection in the wound (remember bacteria dies in the presence of oxygen)
- Consider using a cold pack on your eyebrows to reduce swelling and heat, this can also help alleviate some of the pain/tenderness
- Keep the area clean! Avoid using makeup or other topical agents (besides the antibiotic) on your skin/wound
Using these tips will allow your brows to heal quickly and should prevent the spread or worsening infection.
Watch out for Nickel reaction and Rashes
Another important consideration is that some clients may be allergic to the pigment that you place in their skin.
Reactions to pigment usually come from Nickel and should be discussed prior to your appointment (this should be on the waiver form and each microblader should go over this with the client).
People who have nickel allergies usually know it and will ask, but you should always double check.
A reaction to nickel looks like a rash or almost like a mini burn (image below):
 <img class=”tve_image” alt=”Nickel reaction and allergy to microblading” style=”width: 441px” src=”//browsandbody.com/wp-content/uploads/2017/03/Nickel-reaction-and-allergy-to-microblading.png” width=”441″ height=”234″ data-attachment-id=”286″ scale=”0″>
Rashes can create a site for infection but do not necessarily mean you have an infection if they flare up as noted above.
But because the facial area is so important it’s critical that you get evaluation by a Doctor if you notice swelling or redness like the picture above.
Never microblade over a wound, cut, burn or rash!
Remember:
If you have a wound, cut, burn or rash please push back your microblading appointment.
It is ok to microblade over a scar (as long as it is healed) but you should never microblade over a wound in the skin.
This will dramatically increase your risk of infection.
I have had several clients have to push back their appointments due to issues with cuts and/or burns from things like curling irons.
Just make sure that your canvas is pristine before your procedure!
When to see a Doctor
The bottom line is to always be safe.
If you notice something has changed or worsened quickly please make sure you seek medical attention.
Infections of the face can be very dangerous and should be treated with respect.
As long as you follow the proper guidelines you can reduce your risk of infection dramatically!
And remember that most clients tolerate the procedure VERY well and most clients do not end up with an infection.
Now it’s your turn:
Are you experiencing issues after your microblading appointment?
Do you have the early signs of an infection?
Leave any comments or questions below!

What is Microblading? + 10 Facts to Know Before you Get it Done!
Have you heard about the recent trend that is microblading?
Microblading is exploding in the US and it’s not hard to figure out why.
Microblading allows you to walk around with perfect eyebrows all day, ever day without messing around with make up each morning.
Regardless of how much you know or think you know, this post will help you determine what microblading is and help you determine if you should get your brows microbladed.
Let’s jump in:
What is Microblading?
Microblading is the name used to define a non invasive procedure that applies semi permanent eyebrows to your existing brows.
This small procedure helps transform your existing eyebrows and gives you the appearance that you have make up on 24/7.
Due to the process of microblading it also allows for perfect shaping of your eyebrow all year long.
Many women love the fact that they can customize their brow before we put the pigment on and make it last for over a year.
In fact many of my clients mention that people notice something “different” about them, but they can’t put their finger on it.
You can see an example of a before and after picture below:
On the left is the before picture and on the right is the finished procedure (after 3 hours).
10 Things to Know Before you get Your Brows Bladed
If you are on the fence about microblading or you are thinking about getting it done then make sure you know these 10 important tips!
They should help guide your decision.
#1. Microblading is Semi-Permanent
The first and most important rule is that microblading is NOT a permanent procedure.
Let me repeat that:
Microblading is NOT permanent.
Microblading is considered a semi-permanent procedure which means that it lasts a long time but it is NOT permanent.
You shouldn’t think about microblading the same way that you think about permanent make-up or about tattoo’s – they are not the same.

Microblading will place pigment into your skin but because it doesn’t go as deep as tattoo’s it will not be there forever.
For those interested in the science of it, the microblading pigment is actually placed in the dermal epidermal junction (compared to the dermis for tatoo’s) which means that your body will naturally push out the pigment over time.
It’s more like a “mini tattoo” because pigment is placed in your skin but it will fade 100% over time.
If you decide you don’t like your brows you can also take certain steps to increase the fading process (so don’t let that scare you!).
#2. It may Hurt!
Microblading is NOT a painless procedure.
Imagine taking 10+ tiny needles and poking them into the skin and them dragging them across the skin with the intention of creating a little divot or well.
This is EXACTLY what is happening during the procedure!
The good news is that most artists use numbing cream or topical anesthetic to help reduce the pain.
But just because numbing cream is used doesn’t mean that it’s 100% painless.
Despite this cream some patients still feel a significant amount of pain.
In my experience some 20% of patients feel absolutely nothing, while some 60% of patients feel very little and the remainder actually have a painful experience.
But don’t let the pain scare you!
Microblading may just give you the brows you’ve always wanted, and an hour of pain is worth 15 months of beauty!
#3. Microblading vs Shading
There are really two important procedures that you can get when talking about microblading.
The first is microblading and the second is micro shading or just microblading shading.
Microblading is the procedure which results in curved lines and this procedure is done by pulling or tugging the microblade across the skin.
Microblading creates brow like strokes which very closely mimic your natural brows.
Basically it can be added to your microblading procedure and seriously enhances your results.
Microblading makes your brows look “done up” while shading makes it look like you have make-up on 24/7.
The shading process is a more complicated procedure and it is also done with the microblade, but instead of pulling or tugging the blade is stippled into the skin in a tapping like fashion.
Shading can also be painful so consider that!
#4. Choose your Artist Wisely
Just like picking our your doctor or your dentist you want to make sure you pick the RIGHT artist for you!
Each artist has their own artistic styles and tends to create brows that look similar – even though not exactly the same.
For this reason it is so important that you do your homework before you pick your artist!
Look at each artist, look at their before and after pictures and determine if they will be able to provide you the results you are looking for.
Remember:
Microblading is not permanent, but it does last for MANY months – the last thing you want is for you to spend a lot of money and NOT be happy with your results!
#5. The Touch Up is Not Optional
This may surprise you but the microblading procedure is actually 2 procedures.
The first and initial procedure followed by what is known as the touch-up.
Both procedures are basically the same but the second procedure is super important because it is the procedure that “locks in” your results and makes them last for a long time!
The touch-up is also the time to fix any mistakes or change your shape slightly so that it meets your goals.
You can also change the color, use a different pigment, alter the shape and add or take away from your brows – it’s the perfect tool for perfection.
The initial procedure is about 2-3 hours long and during this procedure you will have your brows placed on your face.
The touch-up is usually about 60 minutes long and the same procedure occurs but with any changes that you desire.
The touch up is usually completed around 6-8 weeks AFTER the initial appointment and after your brows have completely healed.
Most artists build the price of the touch-up into their total price, but some have an extra fee.
Make sure you know if the touch-up will add to your total cost so you won’t be surprised!
#6. You May go Through an Emotional Roller Coaster
It’s not easy to change the shape of your existing brows or to look like a new you.
Because of this it’s absolutely NORMAL for you to have ups and downs in your emotions and to go through a roller coaster ride after you get your brows microbladed.
Believe me when I say that you are NOT alone!
Almost everyone who walks out of their procedure thinks their brows are too thick, or too dark or don’t fit their face… at least initially!
Sometimes it just takes some time for you to settle into your new brows – so just allow that time to happen.
If you don’t like your brows immediately after your procedure make sure to wait at LEAST a week before you make a decision to keep them or not.
98% of the time you will decide you actually LOVE them and you will want to keep them.
It’s also important to know that some fading of your brows is completely NORMAL after the procedure.
In fact your brows will always start out darker than necessary and fade during the healing process.
#7. If You Don’t Like your Brows You Have Options!
Another important fact is that you do have options if you don’t like your brows after the initial appointment.
You ALWAYS have the option to try and rapidly fade them (you can make them completely go away over a few months) if you desire.
In addition you can almost always fix whatever things you don’t like about your brows in the touch-up session.
You can have your artist change your shape, alter the style, change the pigment, control the color and so on.
Just make sure you don’t freak out and keep your cool while you think critically about what you want to do.
#8. Don’t be Surprised if your Brows are not 100% Symmetrical
Believe it or not we actually don’t want your brows to look identical.
You probably don’t believe me so hear me out:
Even plastic surgeons when they do breast augmentations and other cosmetic procedures do not go for perfect symmetry.
Our eyes are conditioned to spot imperfections and we are attracted to those imperfections.
This is why no one is perfectly symmetrical.

In fact when you make things perfectly symmetrical it often looks funny or not quite right.
The saying is that you want your brows to look like sisters and not like identical twins.
You also have to consider the shape and anatomy of your face.
Some women may have asymmetry in their bone structure which may limit the ability to make your brows perfectly symmetrical and this is a good thing.
Don’t walk in expecting that you will get 100% symmetry! And believe me when I say that you don’t actually want it.
#9. It’s Not Cheap!
I would be lying if I said that microblading was cheap!
The average cost of microblading is somewhere between $350 to $600 (depending on who you go to and where you live).
It’s actually not bad if you consider that it may save you 30-60 minutes of getting ready each morning AND you only need to pay that once, but it’s still a lot out of pocket initially.
So how much will microblading cost you over time and for upkeep?
The initial price is going to be high but the up-keep (a touch up every 12-15 months) will only run around $200-$300 per year.
So the total cost is quite small if you average it out by month!
But don’t walk into this unless you know how much it will cost.
I recommend you look at local prices before making your decision.
Prices tend to be much higher in larger cities and much lower in smaller cities (it just depends).
#10. Most People are VERY Happy With Their Results
The bottom line?
Most people who get their brows microbladed are VERY happy with their results.
Very few women get microblading done and then regret their decision.
It certainly does happen, and you will find some of them on this site, but the vast majority of people who get it done absolutely love their brows afterwards.
If you follow these 10 tips then you shouldn’t have any problem in knowing whether or not it is the right choice for you.
How long Does microblading last?
Generally results will last anywhere from 9 months to 15 months.
You will likely retain the majority of your pigment for that duration of time, and it will begin to fade around the 9 month mark.
Depending on the texture of your skin, how old you are and how much oil your face produces these results may be longer or shorter.
People who produce more oil, or who are older will notice that their results fade more quickly.
Does microblading require any up keep?
For the best possible results you really need two visits:
The first visit is to place the pigment and set the outline of the brow. During this appointment you will have the microblading procedure done on your brows.
The first visit is about 2-3 hours.
The second visit is the most important visit for retaining the pigment and for retaining your results.
This visit allows any final changes to your shape or for making slight changes to your brows.
During this second visit we go over our previous shape with the microblade and it “seals” in the pigment even further for long lasting results.
This second visit is much shorter than the first (usually about 60 minutes).
After your second procedure you really don’t need another microblading session until your pigment begins to fade – usually around the 9 to 15 month mark.
It is a good idea to come in to have your eyebrows tweezed to maintain your shape and keep the brows looking beautiful.
Should you get your eyebrows microbladed?
Bottom line:
If you want long lasting beautiful brows that don’t require upkeep or time in the morning then YES you should get your brows microbladed.
The single most important part about the process is finding the stylist that matches your preferences!
Before you choose your stylist make sure your study her work and don’t be afraid to tell them what you want during your appointment! Speak up!
I hope this was helpful, leave any questions or comments below!